Showing posts with label recipes. Show all posts

Sunday, June 17, 2012

the BEST Sandwich

We're working on being more mindful of what we eat.

Mindful Eating, isn't that a lovely phrase?

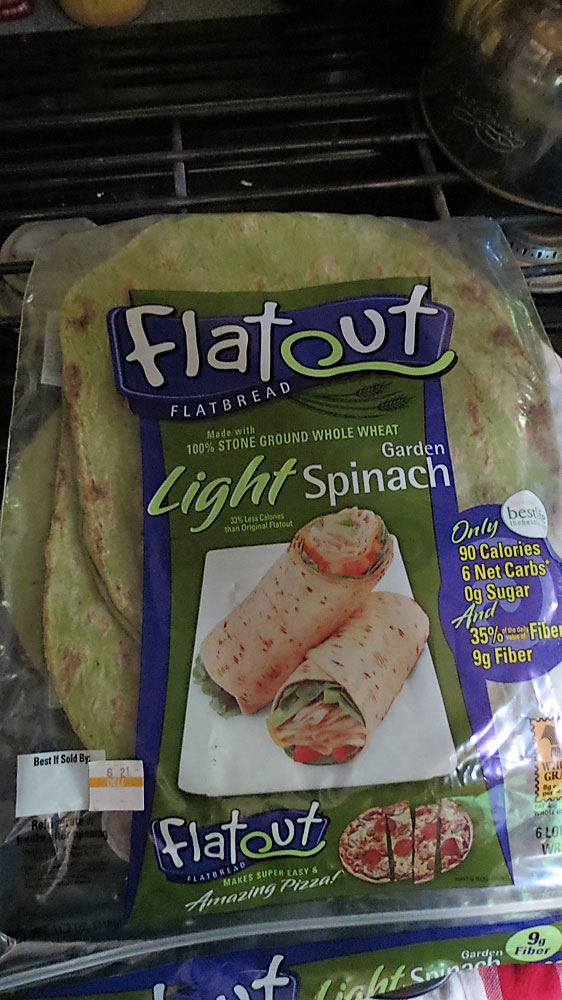
For some time now, we've been using FlatOut FlatBread.  
We like the taste, it's low in carbs and high in fiber.  
And it tastes good!


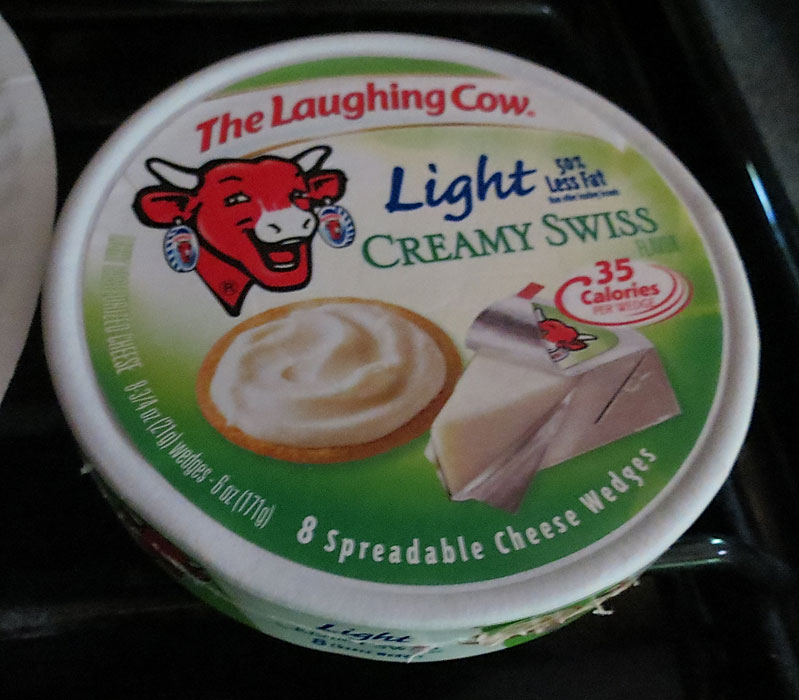
I'm also a fan of Laughing Cow Cheese.  
The other day, we were in Costco 
and they were sampling a new product, 
a soft, spreadable swiss cheese.


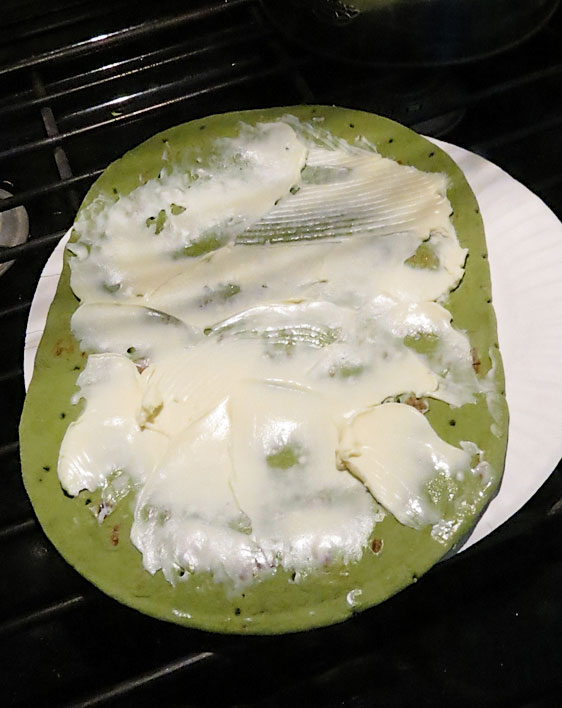
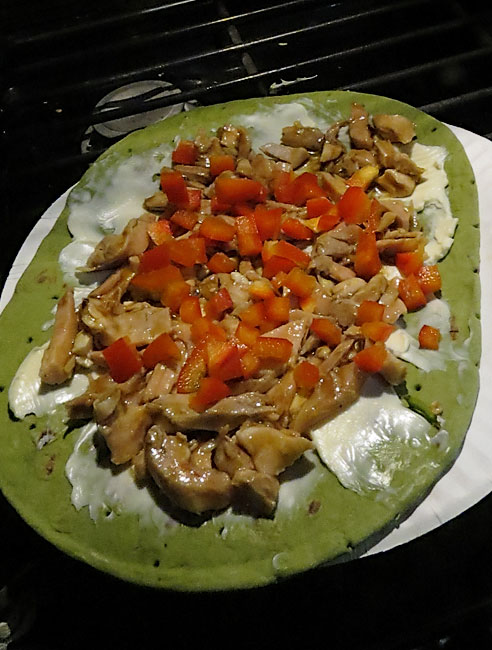
So I took two pieces of the cheese 
and one piece of Flatbread,


slathered the cheese all over the bread.
It spreads just like softened cream cheese
but gives a slight cheesy flavor to the sandwich.


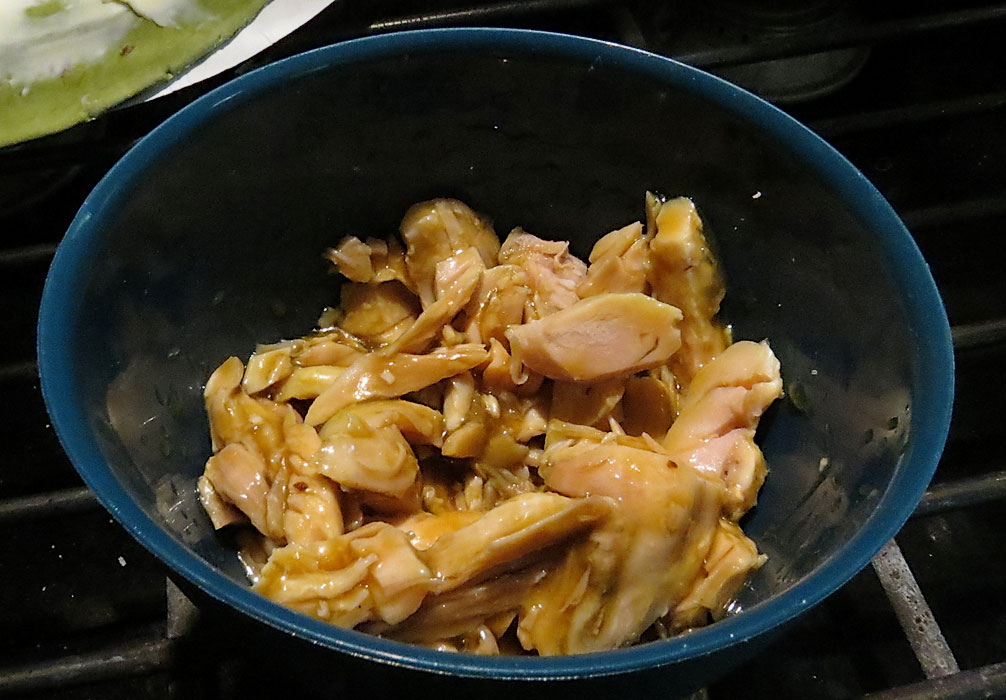
Next I mixed four ounces of left over chicken with
two tablespoons of
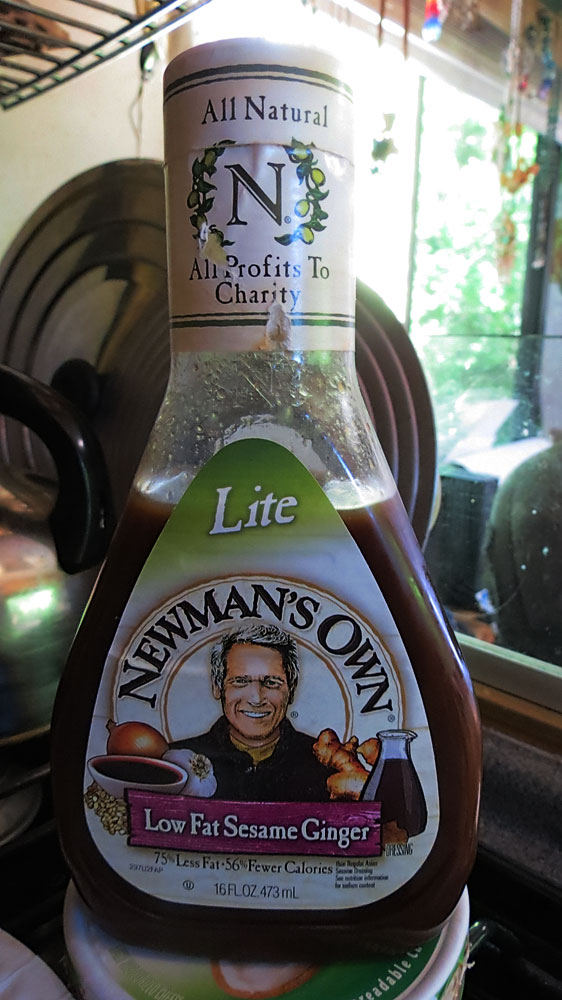
Paul Newman's Low Fat Sesame Ginger Salad Dressing.


You have tried 
Paul Newman's Low Fat Sesame Ginger Salad Dressing, 
haven't you?  
It's one of the best dressings I've ever tasted.
Perfect on salad, chicken, beef or vegetables. 
Whatever you use it on, guaranteed,
it will up the flavor quotient of your dish.


Next I chopped up a bit of red bell pepper,


then added some lettuce, salt and pepper 
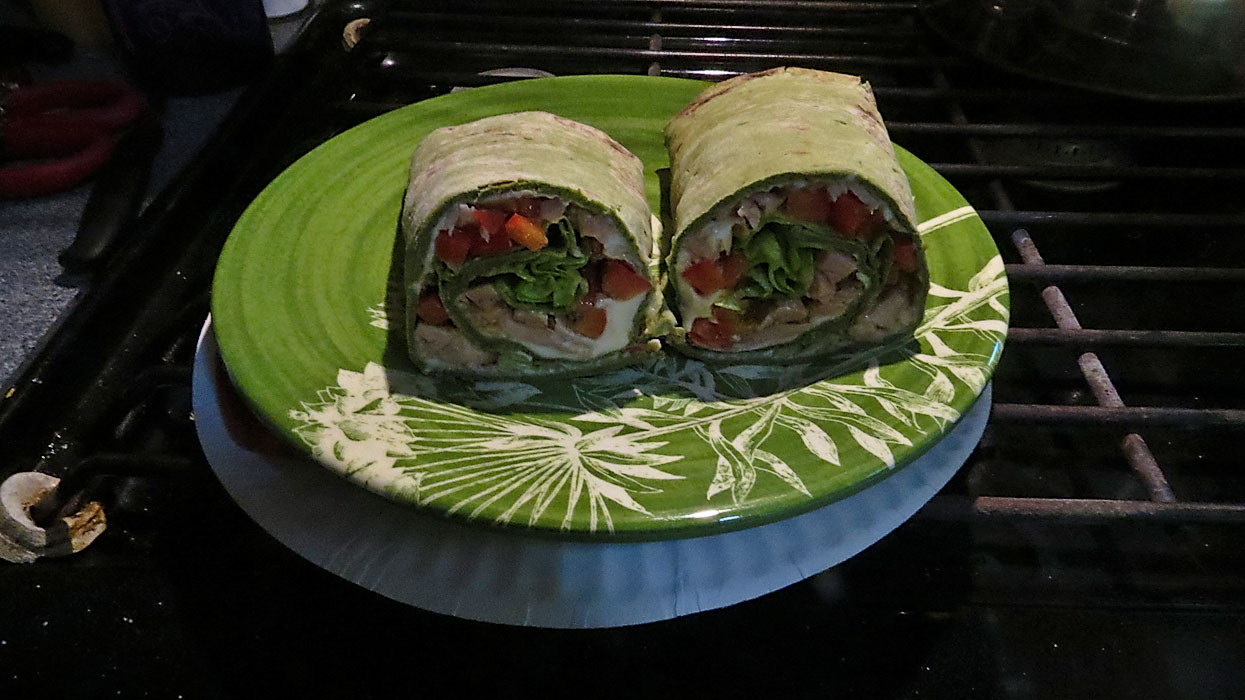
and rolled her up.
Does this look good or what?


As good as this tasted, 
the best news is the nutritional count.  

It comes in at 315 calories, 
a mere 10.5 grams of fat.
and
26 grams of carb
(minus 10 grams of fiber for a net total of 16 carbs).


Not bad for such a tasty treat!

Monday, April 30, 2012

Balsamic Vinegar


I absolutely LOVE Balsamic Vinegar, there's just nothing else like it in the whole wide world.

That said, it can be expensive, but so worth it.  Still, the really good stuff isn't always available, so I'm going to let you in on a secret.  When you have a Balsamic that is just ok, but missing that deep flavor of the better brands, you can reduce it!

Simply put it in a pan over a low heat till it just comes to a bare simmer, then let it go for anywhere from twenty to forty minutes.  It should thicken considerably, concentrating the flavor.  Put it back in the bottle and refrigerate and voila! you have nectar.

Of course, if you can find (and afford) the better stuff, do so, but this sure works in a pinch.

Now then, you have this wonderful ambrosia, what do you do with it?

My favorite is a simple Caprese salad.

First, you need real ripe tomatoes.  Not those things you buy in the market, but fresh from your garden, or if you can find them, a good local Farmers Market.  If your tomatoes aren't sweet and ripe, this really doesn't work.  Then you need a good fresh mozzarella cheese, preferably a soft buffalo cheese.  Then fresh basil and a little olive oil.  And of course, Balsamic.

This is all it takes for a basic Caprese salad.

Slice your tomatoes and your cheese, layer them on a plate, tomato, cheese then a leaf or two of fresh basil.  When your plate is full, simply drizzle a bit of olive oil, then drizzle your balsamic.  If you've reduced the balsamic, it should be thick enough to be decorative, if you're so inclined.

And while a basic Caprisi is heaven, there are a lot of variations.

I like to add a tiny bit of thinly sliced garlic (paper thin, it should melt in your mouth).  It's also nice if you have some sun dried tomatoes, chop them very fine and spread those over the salad (or you can mix them in with the olive oil prior to dressing).  A few chopped pine nuts are also a nice addition.

Our local Farmers Market opens tomorrow, 
I can hardly wait.


Wednesday, August 31, 2011

Green Chile, Tomatoes and Blah Blah Blah

.
Yeah, I know, I've been bad.

I have a million excuses, but none really matter. I still have hula pictures to post, plus we took a day trip to Big Sur which also means a whole other set of pictures.

But sometimes I just can't blog. I would really like to do it every day, but it just isn't possible. Really, I feel like I don't have a lot to write about, so I'll just mention a few things I've been doing.

Like cooking.

I always go back to cooking, you know? It just fills a place in my soul like nothing else.

We had some good friends from New Mexico send us some fresh roasted green chiles. This years crop has just come in and we couldn't resist. Cost be damned! They arrived yesterday so this morning we had green chile with eggs, yum yum. There is absolutely nothing like New Mexico green chile, they really are unique.

Having had a taste of them, we decided we needed them for dinner also. I haven't made chile sauce since we left New Mexico and have I ever missed it!

First I sauteed a good bit of fresh garlic, then I added the chiles and a bit of chicken broth. I let it simmer a bit (you add more broth as needed, we like a good amount of "sauce") then right before serving I add a bit of arrowroot to thicken it a bit. Traditionally, you would start with a roux, but we're off flour, so we use arrowroot, added at the end. It thickens perfectly and adds no flavor of its own.

Next, keeping the sauce bubbly on a back burner, we made loose hamburger patties from fresh (not frozen) grass fed beef. Keeping the patties nice and loose gives you lots of those crunchy bits we like so much. For this dish, we like the burgers pan fried over a high heat (it's those crunchy bits again). When the burgers are done, put them on a plate, cover them with lots of grated cheese (or queso if you have it available) then slather a big old bunch of the chile sauce over the top.

Boy have I ever missed this . . .

We paired it with a green salad topped with dry farmed tomatoes. Have you tried dry farmed tomatoes? Another fine discovery, these are grown with very little water, forcing the roots deep into the soil and concentrating the flavor into the fruit of the tomato. I'm not describing this process very well, but if you taste one, you'll know it immediately.

Having almost given up on ever purchasing a good tomato again, these are a real revelation. Smaller than most, they are firm and sweet and exactly what a tomato should be.

We paid $3.69 a pound for these, but it was worth every cent. We will be buying more. If you can find them, try one, no matter the cost. Try just one and I think, like us, you'll be sold.

Eventually, I'll get the pictures up and maybe even share my recipe for low carb sugar free peanut butter cups. These are really fantastic . . .

But for today, that's it!


Monday, July 18, 2011

Tired . . .

.
This will be kind of a disjointed post. We've been so busy, and now we're both completely beat.

For the last ten days or so, we've been going through the house, working furiously. Last week we had a flea market to sell at, as well as another appointment at the used book store.

Since I've been retired, I've gotten so used to setting my own hours. It's always stressful when I know I have to be somewhere at a specific time. When that time is early in the morning, it's even worse. The night before the flea, I had a horrible time sleeping, and finally, at 4 am, I just decided to get up. The one good thing about getting up at 4am is that you get the great spot at the flea market. Out of the fifty odd sites, we got the only ones with shade all day, so at least we don't have sunburns!

In addition to the flea, last Thursday, we had an appointment at the local used book store. We took in another twelve boxes of books. The books we've taken in before are old inventory from when we used to sell online. But finally, it was time to start in on my books. I have to tell you, the memories have been coming fast and hard.

I've collected books my entire life. I learned to read early on and was always in advanced English classes, even in grade school. Reading has been encouraged my whole life, and truthfully, I cannot remember when I didn't collect books. Over the years, I've learned to let go of the casual books I've read, but somewhere along the way, I became enamored of science fiction and old children's books. And now I'm down to getting rid of these.

Twelve boxes in, eleven boxes back, plus a hefty chunk of change. The rest go in the garage to be resorted for the next flea market or the auction. While this is all a huge effort, I must say, the financial rewards are coming through and the house actually has some bare space.

One of these days, we'll be done, and back on the road.

Before I end this tirade, I want to share a quick recipe that I just "discovered". I'm sure someone, somewhere has done it before, but I've never heard of it, so I'm claiming it as mine.

The ingredients are as follows

Butter
2 large portabello mushrooms
green onions (or whatever onions you have on hand)
3-5 pieces crisply cooked bacon, roughly chopped

Brown a good amount of butter in a large frying pan. Next, slice/chop up two large portabello mushrooms. I imagine you could use regular mushrooms, but I've made this twice, both time using portabellos, and I believe their firm texture adds to the dish. Place the mushrooms in the pan over a low heat allowing them to cook slowly. While the mushrooms are cooking, chop up three or four green onions and if you like, a small yellow onion as well. When the mushrooms are close to done, add the onions and the bacon, cover the pot, lower the heat and let the pot heat for a few more minutes.

When all the ingredients are cooked through, it's ready to serve. This is a wonderful dish, really tasty. One night, we had it as a main course with salad on the side, then tonight we had it with hamburger patties. It's like mushrooms on steroids. I recommend it highly.

As a final note, I just read this post and while I know it could use a good bit of editing, I'm too tired, so I'm going to hit the post button and go to bed.

Saturday, April 9, 2011

What We Found Today (and a Recipe)

.
We've started on "the room".

"The room" is an addition to our garage, about 15 by 15, packed wall to wall, floor to ceiling with stuff. The room shouldn't be confused with the garage (which is now only about 1/3 full), or the attic (which is still full) or the house itself, which is still about 2/3 full.

Are you getting the picture? It's not pretty, but it is kind of interesting. Sort of like going to a huge flea market, where you see things you half remember.

Like this.


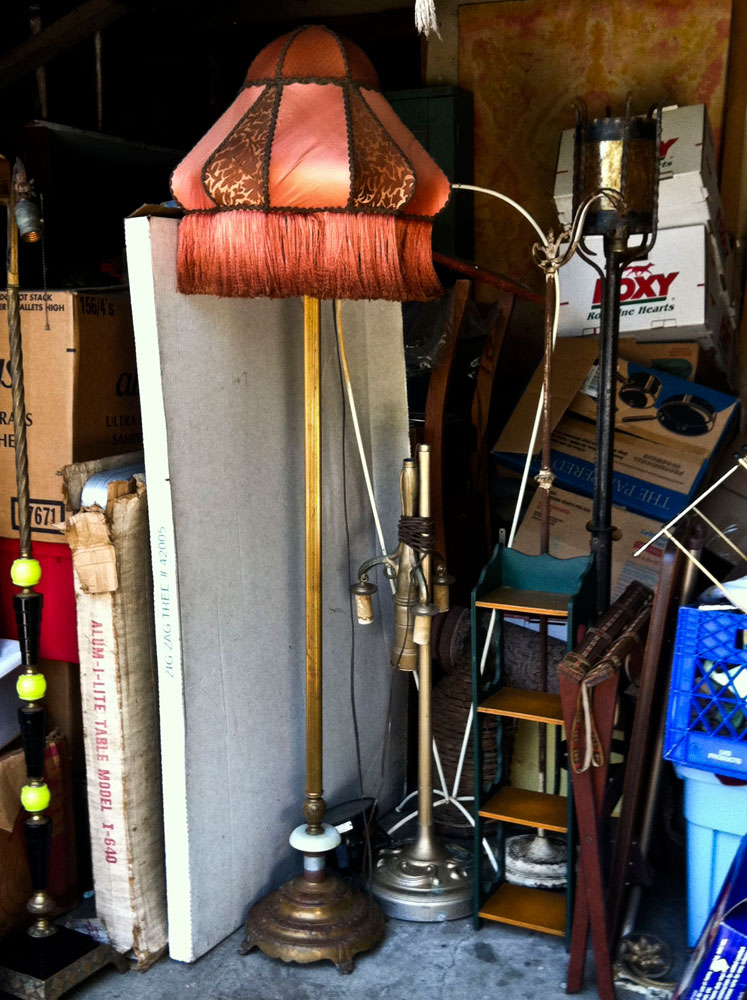
Regular readers have probably figured out that, over the years, we've tried a lot of different things. These include blanket weaving, jewelry making, cooking, book selling, Disney collecting, framing and matting, and many more I can't even remember. We also made a couple of lampshades, which I had completely forgotten about. Then today we found this in the room. A bit the worse for wear, now it's off to the auction.

Then there was this little book, which I thought was very cool. I couldn't find a date on it, but it talks about the original Kodak and announces the new Kodak 2. Great illustrations and photographs.


I also found a stack of Life magazines, which always derail me for a time while I look through them. What a time trip these things are. In honor of Liz, whose passing I seriously mourn, I thought I'd include this.

Great artwork,
they really don't do posters like this anymore.


We're beginning to feel like we're making a but of progress.

I've been hoping to find a movie projector, but so far, no luck. Then, I was looking on Freecycle (which we're using to get rid of some of the "stuff") and I saw that someone was offering an 8mm projector. I wrote them, told them I would be using it for a while then re-Freecycling it. That was fine with them, so in the next couple of days, we'll be able to look at some of the old family home movies. I'm kind of looking forward to that.

While I was making dinner, the hinge on our flip up counter broke. Lazy Daze puts a small flip up counter in all their rigs. A good idea, but we improved it by removing the original and replacing it with a regular cutting board. This gives us a much larger working area, but I never realized how much we use this space till I couldn't access it anymore! We use it all the time. This is a modification we recommend to all new Lazy Daze owners, and now I know why. We went and looked for a new hinge, but none of our local hardware stores had one large enough, so we'll have to order it direct from Lazy Daze.

Back to dinner . . .

Some friends gave us a huge bunch of fresh spinach, and usually Terry's not too fond of spinach (but I love it). Then I remembered a salad we used to make at Ghost Ranch, using spinach, strawberries and nuts. I found several recipes online, but of course I was missing a couple of ingredients, so I just winged it. It came out really well, and Terry even ate two helpings, so it must be good. Here's the recipe in case you might want to try it.

Ingredients

Salad
Spinach (a couple of bunches)
Strawberries (a couple of cups, sliced)
nuts (I used sliced almonds, walnuts also work)
Most recipes call for candied nuts, but I used plain
Dressing
1/2 cup oil
1/4 cup apple cider vinegar
pinch of salt
squeeze of lemon
sugar (I used Splenda, works fine)
poppy or sesame seeds (or both)
a bit of paprika
a bit of dry mustard

Basically, you toss the cleaned greens
and the strawberries,
then add the nuts.
Then, just mix all the dressing ingredients
and toss it with the salad.

This is really quick and easy, and sure to be a hit with just about anyone. The spinach is nice and sturdy and holds up well to the spicy dressing. If you have candied nuts, they do add an extra kick, but they're not really necessary.

That's it for today. We have a car full of auction items, and they aren't open tomorrow, so we may go on a little ride, weather permitting.

Monday, March 21, 2011

REALLY Good Cauliflower

.
Now that we're back from our little vacation to Morro Bay, we're back on the straight and narrow low carb lifestyle.

Being somewhat bored with our regular fare, I started searching my gigantic file of recipes for something different to add to our regular meals.

We both love cauliflower, and I fix it in a number of ways. Roasted, steamed, fried, mashed, made into a potato salad (no one ever notices that it's cauliflower instead of potatoes), we love it all.

But I wanted something different that would spice it up just a bit, and I found a recipe that sounded like a good place to start.

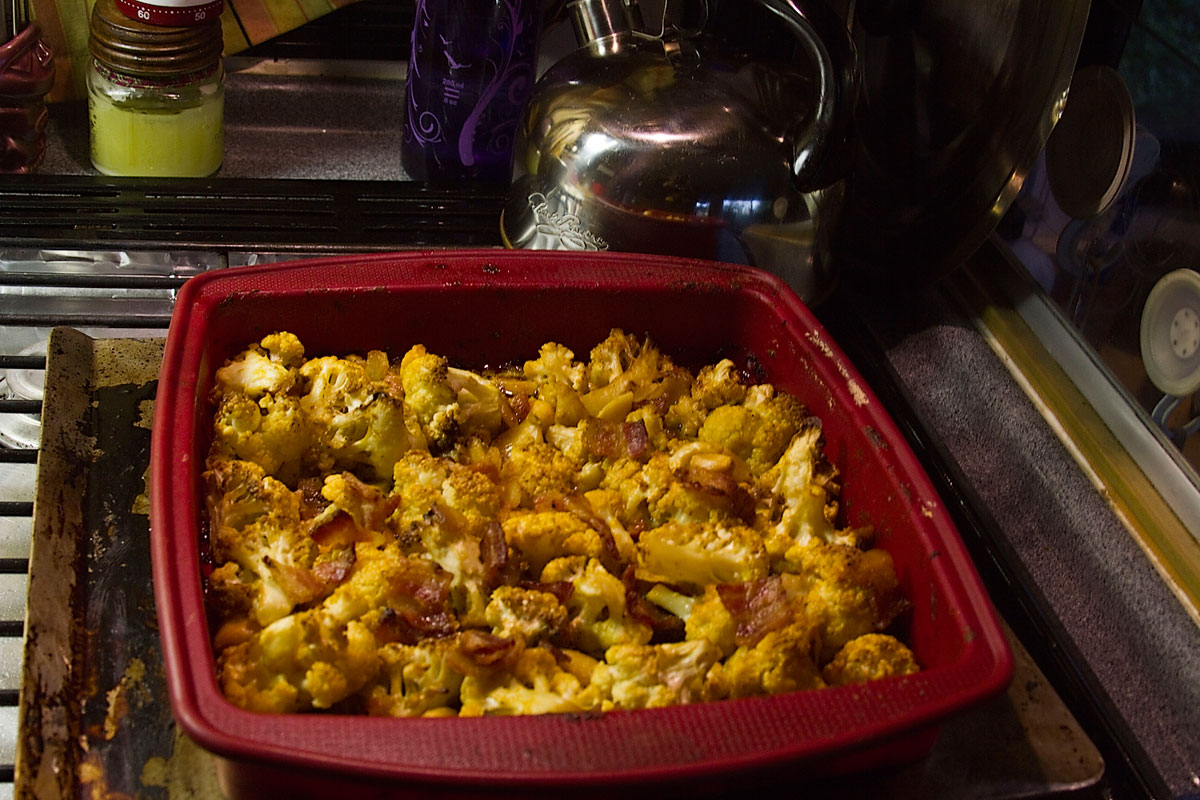
Easy enough, you just cut it up into florets, mix a bit of mustard and olive oil to coat the cauliflower, then pop it in the oven.

This sounds really promising! Like always, I followed the instructions for a new recipe.

Well, I almost followed them.

I thought that a bit of blue cheese dressing mixed with the olive oil and mustard would brighten it up a bit. Then, because I would be roasting it, I decided to throw in a couple of handfuls of whole garlic cloves (I love that I can buy a huge bag of peeled garlic at Costco, makes these kinds of additions so easy).

Then I decided to chop up a couple of pieces of bacon for extra flavor. Yum! This was listed as optional in the original recipe, but it really added a nice smoky underflavor. Then into a 350 degree oven for about an hour and boy, was this tasty!


Next time I will make a few modifications. It came out a bit oily and I believe that that's because of the olive oil. Next time, I'll mix the mustard and blue cheese dressing with just enough water to coat the cauliflower. That way the only oil will be from the bacon. I might also try adding some onions.

I love roasted veggies, and the sauce really spiced it up nicely, adding a bit of zip without overpowering the sweetness of the roasted cauliflower.

I might also try this with broccoli or Brussels sprouts, or maybe a combination of all three.

In any case, it's a keeper for future meals.

Thursday, January 27, 2011

the World's Best Blue Cheese Dressing

.
Just a quick recipe today.

We love blue cheese dressing, it is our very favorite. The problem is, I can't seem to find one I really like. Bob's is OK, also Marie's, but really, they just aren't quite right, at least for my palate.

Then I look at the ingredients and I know I could do with less of the additives.

So I keep going back to an old tried and true recipe I've had for years. While rich in flavor, it's low in carbs, and since we thin it a bit and use a pre-measured amount, we're really comfortable using this instead of an oil and vinegar dressing.

I believe this was in one of the first low carb books I read, probably Atkins, but I can't say 100%.

What I can say is that this the the best blue cheese dressing we've ever tasted, and the one against which all others are measured.

Enjoy!

Homemade Blue Cheese Dressing

3/4 cup sour cream
1/2 teasp dry mustard (I usually use a whole teasp)
1/2 teasp black pepper (I usually use a 2 teasp, we like the pepper bite)
1/3 teasp garlic powder (again, I usually use a whole teasp)
1 teasp worchestershire sauce
1 - 1/3 cup mayonnaise
4 oz crumbled Blue Cheese (or more if you like)

To Mix

1. Combine sour cream, mustard, pepper, garlic powder and worchestershire in a mixing bowl and blend for two minutes at low speed. I use my stick blender and mix it in a long tall container so it doesn't come up over the sides. Mix it till it's well blended.

2. Add the mayo and blend at low speed till incorporated, then increase speed to medium and blend for two more minutes (or again, till it's all smooth and creamy)..

3. Slowly add blue cheese and blend at low speed no longer than four minutes.

You can blend longer than four minutes, but if you like to have chunks of blue cheese, stop when they're still visible. Otherwise, the taste will be the same but you wont get those tasty chunks.

4. Refrigerate for 24 hours before serving. You can use it immediately, but it really is better after it sits for a while. It also gets really thick so we thin it with a bit of water to the consistency we like. The water doesn't seem to dilute the taste at all.

That's it! I guarantee you'll love this. It's not only great on salads but also perfect as a dip.

Monday, January 24, 2011

Cambozola!

.
I am hooked.

I am addicted.

I have a monkey on my back.

And it's all Costco's fault.

You know how, when the holidays roll around, all of a sudden, they carry something like a hundred new exotic cheeses? And every time you go, there's someone there, offering you samples of creamy goodness that you can't believe you've lived without all these years?

Well, that's exactly what happened to me. This woman offered me a sample, and honest to God, I was transported.

Cambozola (and don't you just love that name?) is a creamy mixture of Gorgonzola (very similar to Roquefort) and Stilton cream, resulting in something that tastes like a richer cream cheese laced with a slightly mild Blue Cheese. Bad description, I know, but trust me, this is the best cheese I've ever tasted.

It's incredibly tasty spread on crackers or toast, unbelievable with pears and apples and it's also bliss all by itself.

Now I live in the fear that every time I go to Costco, they won't have it anymore. I really do fear the pain of withdrawal.

Trust me,
if you see it in a store,
just pick it up.
It's a guaranteed party in your mouth.

Monday, January 17, 2011

French Onion Soup

.
How I miss the times when we were footloose and fancy free.

No plans, no work, we'd get up when we wanted. Go take pictures four to five days a week as we pleased. I had time to try new recipes.

Life was indeed very good.

Now it's like I'm back at work. When we're not working on the house, I feel guilty, like I should be working on the house.

And I have no doubt that my blog entries were a lot more interesting than they are now. I loved writing about our travels and the new things we discovered . I loved looking at my photographs and learning new ways to manipulate them.

Now, I'm not sure I should keep up the blog while we're clearing the house. I'm pretty sure everyone isn't interested in all the junk we're selling, and it sure seems like we're not doing much of any interest these days.

But I still cook.

Not like I did when I had nothing but time, but I still find myself looking for new recipes. With the abundance of fresh vegetables here on the central coast, I find myself looking for new ways to serve them.

Today, we went grocery shopping at Costco. I love Costco, especially since we have the big refrigerator in the house. With that available to us, I'm much less reticent to buy in the large quantities that Costco demands.

Today, onions were on the shopping list, but the smallest amount we could buy was ten pounds (for just $3.50). It would take the two of us forever to use up ten pounds of onions, but then I remembered French onion soup.

YUM, I threw the onions in my cart.

Then I got home and looked at my recipe. I haven't made it in years and somehow I forgot that I'd have to stand over a pot of sweating onions for close to an hour to get them started for the soup. Not my idea of a good time at all. No wonder I haven't made it in so long.

Hoping for some kind of reprieve (and some good soup) I went on the internet and found a recipe where, instead of sweating and caramelizing the onions on the stove top, you do it in the oven.

Hey this looked do-able.

By the time I got home, it was close to 7pm, way too late to start the whole project. But wait, the recipe says you can caramelize the onions in the oven, then put them in the fridge and cook the soup up to three days later!

So that's exactly what I'm doing. The rig smells like sweet roasting onions. They're turning into a nice caramel colored mush, and in a day or two, we should have soup.

I'll let you know how it turns out.

One more culinary note . . .

We haven't been able to find whole chiles in the can since we've been here in California, hence, no green chile stew. We miss having chile all the time, (shades of New Mexico). Then today, we discovered a Mexican market down by the ocean, and there they were, my beloved chiles. They were kind of expensive ($3.70 a can) but by buying a case, I was able to get them at $3.00 per can. Even though we have the onions for the soup ready to go, tomorrow it will be pork with green chile.

So for a day at least, we can pretend we're back in New Mexico.

Saturday, January 15, 2011

the Klutz, and Lemony Ginger Goodness

.
I'm embarrassed to say that in my haste to work around the house yesterday, I somehow lost my footing and took a dive into the floor. One leg went one way (twisting my ankle) and the other another way, scraping my knee to the bone.

Good thing my bone density is high, nothing broken but my pride.

Am I the world's biggest klutz or what?

Anyway, that put me out of commission yesterday, and when I woke up today, I was sore everywhere, so we decided another day of taking it easy was in store.

Since the day was to be spent in the house, we decided it was a good day to read and watch a little television. I'm still enthralled with the Kindle and Terry loves whatever he can pick up,

So we read for a while, then we decided to start watching Carnivale. It's a two season series from 2003, first shown on HBO. Somehow we missed it when it first aired, so when I saw it at the local library, I checked it out.,

Wow, what a strange trip this one is. Part depression era story, part supernatural thriller, it's quite intriguing. Strangeness aside, there are several things about it that keep me watching. The cast is superb and the photography. The look of this show is so beautiful. The light, the color, the period, they really nailed it.

Then there are the actors. Lacking real "stars" it boasts a cast of excellent character actors that add a realism that is in too short supply in most movies today. Some of my favorites are Robert Knepper, Patrick Bauchau, , Michael J. Anderson, Tim DeKay, Clea DuVall and Amy Madigan.

If you haven't seen it, for the acting alone, I'd recommend it.

Sitting around all day with aching legs set my mind to cooking (don't ask me why, since standing for any length of time was pretty painful). I thought about what I would like and finally remembered that, here at the house, we have an electric ice cream maker. Looking in the fridge, I saw that we had brand new container of plain yogurt. And remember when I talked about Nellie and Joe's Key West Lime Juice? Seeing it, I decided that frozen lime yogurt sounded like a real treat. When I went to get the frozen canister out of the freezer, I noticed I also had fresh frozen ginger (I always keep my ginger in the freezer). I decided that would be the perfect compliment.

I took three cups of plain yogurt, about twenty drops of liquid Splenda, a bit more than two tablespoons of lime juice and about a teaspoon of vanilla, then added a couple of tablespoons of fresh ginger (grated with a fine micro plane). Mix all of this together and put it in the freezing bowl of your ice cream maker. Let it go till it's nice and thick and smooth and YUM!

If you don't like it really tart, you might want to cut back on the lime juice, and if you don't want the slight heat, cut back on the ginger.

But if you make it just like I did, you're in for a wonderful party in your mouth!

Tonight my legs are feeling a bit better, so tomorrow, I'll try to use them some more, and hopefully by Monday I'll be good as new.

Thursday, January 13, 2011

Roy and Dale

.
In a comment on yesterday's post, Donna talked about how much she loved Roy Rogers when she was a child. We must be soul sisters because I know just exactly how she feels.

As a child, I watched the Roy Rogers Show every day on our old television. I can't begin to tell you what an impression he made on my young mind and heart.

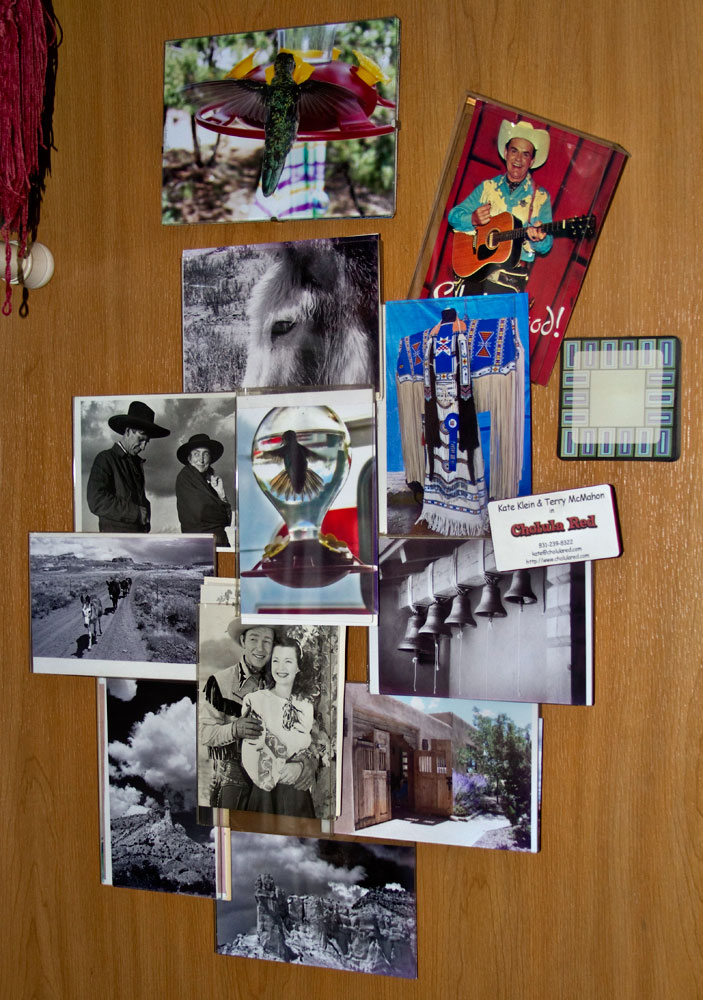
It's a memory I still carry with me. In fact, here's a picture frame we have in the rig, and as you can see, Roy and Dale are prominently displayed. The other pictures change from time to time, but Roy and Dale are a constant.


One of my favorite memories is of a visit we made to the Roy Rogers Museum, back in 1996. Below is an excerpt from my Disney newsletter that recounts the whole experience (and I apologize in advance, the writing would be different today, but I just did a cut and paste).

-the Roy Rogers-Dale Evans Museum-

This isn't exactly Disney, but it touched me (Kate) in such a way that I wanted to share the experience.

On a recent trip to Southern California, we took a little side trip up to Victorville to visit the Roy Rogers-Dale Evans Museum. These two have always been special to me, embodying a philosophy that has served to remind me of the standards and values that I consider so "Disney".

Not only have Roy Rogers and Dale Evans shared a long and illustrious career, but they have maintained a loving marriage, raised a family and spent a lifetime putting their money where their mouth is. Just in case you are unfamiliar with the pair (outside of their careers), they have always made time in their busy schedule to give of their time, visiting children's hospitals and orphanages, sharing of themselves wherever they went. And they not only talked a good game but they also adopted several children in addition to raising their own. They have worked tirelessly through the years, setting a wonderful example in both word and deed.

So we went to the Museum, not really knowing what to expect, but excited none the less. When we got there, we found it under heavy construction, but still open during the renovation. We wandered through, looking at the many tokens of their careers. In addition to their memorabilia, we found a thorough representation of the Western entertainment industry, as well as such personal mementos as the truck that brought Roy Rogers and his family to California back in the 1930s. The original NellyBelle is also on display. All of this was a great experience, showcasing not just the public lives, but also affording a glimpse into the private lives behind the public facade.

Then we came upon what is the really personal part of the museum. It's here that you have the chance to see all the family memorabilia that Roy has saved over the course of a lifetime. In the brochure for the museum, he states that "Everything we've ever done is right here for everyone to see" and it truly is.

As we wandered among the family photos and such odds and ends as tools and books, we began to get a strong sense of how important the family and tradition was to these two people. As we looked at the personal photographs and memories we couldn't escape the feeling that we were getting an "up close and personal" look at this couple. It's obvious that their love of life is not just something they talk about but something they've lived in their daily life. And they are willing to share it with everyone.

I actually felt like I was getting a chance to know these people.

Then I wandered into a little nook that brought it all home in a way I wouldn't have thought possible. There is a small part of the museum that's devoted to the children Roy Rogers and Dale Evans have lost over the years. Such things as birth certificates, report cards, and booties are on display. They also share such items as personal letters from the children and their own personal observations from these early lives. After I was there for a time, I found tears in my eyes, the pure love and generosity I felt from this display was that moving. It made me feel like I was a real part of these lives, sharing in not only the highs but also the lows, involving me in a way I find all too rarely in this modern world.

And I thought to myself how I would love to have the opportunity to meet these folks, for I'm sure that they are just as warm and dear as can be.

Then we heard the Roy Rogers himself was in the museum. I thought how nice it would be to shake his hand, but when I saw him come around the corner, there was such a push and ruckus that I didn't have the heart to impose on him further. I felt he had already shared more than most people do in a lifetime.

So I just stood back and watched, and said a silent "Thank You" to this most special man. I only wish I could have had the chance to see Dale also, but that's all right. I feel they have already shared more than enough.

If you ever find yourself in the area, make a special effort to visit the museum. Its right off the highway in Victorville, about 90 minutes away from Disneyland, but very close in spirit.

*-*-*-*-*-*-*-*-*-*-*-*

a note: we again went to the museum some years after both Roy and Dale had passed. They had moved it to a new facility and it had somehow lost it's charm. After that, it was again moved, this time to Branson Mo.

*-*-*-*-*-*-*-*-*-*-*-*

We went to the auction house again today and we're told that they are very close to full for the auction next Thursday. With that news, we're going to start boxing up pieces for the next auction that will be held on Feb 3.

It actually feels like we may be making some headway.

Saturday, January 1, 2011

Sugar Free Cheesecake

.
We pretty much try to eat low carb as much as possible. While we're not real anal about it (especially this time of year), we do make a concerted effort.

Basically, this means we try to avoid sugar, wheat and most starchy vegetables. We haven't found this too difficult, but every once in a while, the desire for yummy sweet desserts overcomes us.

And when it does, I usually make us a cheesecake.

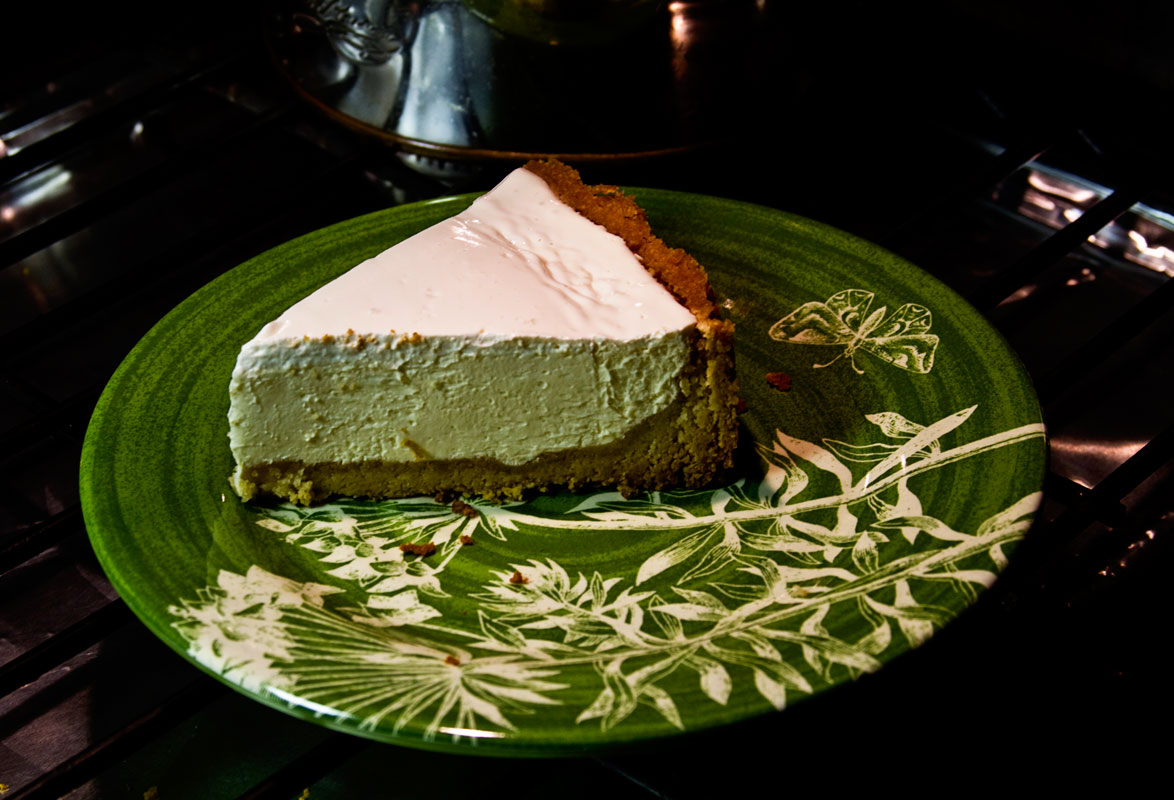
Since we avoid wheat, we can't have the regular crust (graham crackers, vanilla wafers, whatever). Sometimes I just make a crustless cheesecake, but I really prefer a crust, so I've found a great substitute in almond meal. It has the consistency of flour, but is high in fiber and low in carbs. You can either buy it pre-ground, or run it through your food processor. For my crust, I melt some butter and mix it with the almond meal, press it into a spring form pan and bake it for about ten minutes, just enough to give it a bit of color.

For the filling, I use three 8 ounce packs of cream cheese (room temperature) three eggs (also room temperature) 1 1/2 teaspoons vanilla and the equivalent of one and one half cups of sugar. Since we don't eat sugar, we use Splenda, which bakes up just fine. If you like a bit of tartness (which we do) you can also add three tablespoons of lime juice.

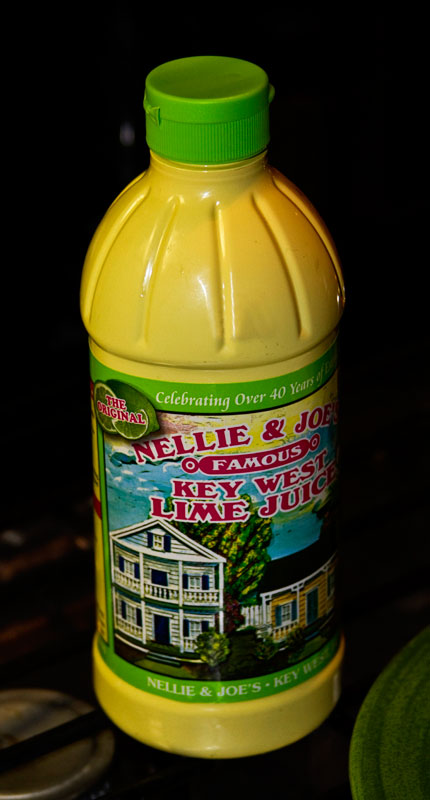
Right here, I'd like to mention a product we first found in New Mexico called Nellie and Joe's Key West Lime Juice. I have to tell you, this is the very best seasoning I've ever found. For years, I used fresh lemons or limes when I needed that bit of tart zip. Like almost everyone else, I had tried that gross liquid that comes in the little plastic lemons and limes and was disgusted. It just doesn't taste like anything real, more like some concoction of chemicals that try to resemble citrus.

Then one day, I saw Nelie and Joe's and decided to give it a try, and my culinary life changed forever.


This juice is like nothing else I've ever used. It really does taste like fresh lime juice, and it keeps for a really long time when refrigerated. I use it in salad dressing, for a marinade, in making dips for different fish (I love it mixed with sour cream and dill and drizzled over salmon). It's also excellent in drinks.

Give it a try, it's superb.

Okay, back to the cheesecake. You take all the filling ingredients and mix them till they're creamy smooth. Since I'm not afraid of raw eggs, at this point I give it a taste, just to make sure that it's sweet or tart enough. Then you put it in the baked pie shell and stick it in a 350 degree oven for one hour. You want it to be firm but not hard, if that makes any sense.

When the cake is done, take about a cup of sour cream, sweeten it up with some Splenda and add a heavy dose of lime juice. You have to do this by taste as everyone likes it different. I like to have this topping really tart, as I think the bite it gives the cake is a nice touch, but you might want it sweet. It's up to you.

Once you have the sour cream topping to your taste, just spread it on to the top of the cheesecake. Put the cake in the fridge for a couple of hours, and when it's all firm and set up, you can take this anywhere and no one will ever guess you've left out the sugar.


Yum!

Wednesday, December 29, 2010

the Perfect Prime Rib

.
It's been a few days since Christmas, and for all that time, Terry has been sick with a cold and a really bad cough. I've been with him playing nursemaid, and taking care of regular business (food, meds, cleaning).

Consequently, I haven't been posting, but I wanted to talk a bit about our Christmas dinner.

As I mentioned before, we planned on having a prime rib (a beautiful choice cut of meat we got at Costco). I haven't cooked a prime rib for probably fifteen years. The last time, I packed it in rock salt and cooked it in the oven. While that came out beautifully, it was really messy, resulting in a lot of hardened rock salt. And I lost all the juicy run off, because it was all too salty.

Knowing I was really unclear as to how to cook a very expensive prime rib, like always, I went to the internet. There, I found about a million different recipes for marinades, rubs, and sauces, not to mention different ways and times to cook this piece of meat.

After spending hours looking through all of them, I finally decided on the one that looked the easiest, and am I ever glad I did!

This method says you can use whatever rub or marinade you like (I like kosher salt, fresh ground pepper, some dry mustard, a bit of oregano, garlic and onion powder). The day before you'll be cooking, you rub the meat with olive oil (or butter, your choice) and then push the rub well into all parts of the meat. Then wrap the meat in saran wrap or a tight plastic bag (we use a vacuum sealer) and let it sit overnight so the rub has a chance to do it's job.

This next part is really important . . .

On the day you'll be cooking, take the meat out of the fridge at least two hours before you intend to cook. Longer would be all right, as you want the meat to be at room temperature before putting it in the oven.

Next you want to set your oven for 500 degrees, It's really important that the oven has a chance to preheat up to this temperature. Now you want to multiply the weight of your meat by 5. My meat was four and one quarter pounds, so my time was twenty one minutes and fifteen seconds.

Now place the meat in a pan that is at least as high as the roast, and has no more than two inches around the edges. Otherwise your drippings will spread out and probably burn, leaving you with no ingredients for your au jus.

When the oven is up to heat, you put the meat in for the prescribed amount of time. When the timer goes off, turn your oven off and leave the meat in the oven for two hours. DO NOT open the door during that two hours.

When the two hours is up, you'll open your oven to a perfect prime rib, brown and crunchy on the outside and a exactly medium rare on the inside.

Could this be an easier? A note for all you RVers, we cooked this in the motorhome, it worked perfectly in the oven, so you can do this no matter where you're camping.

Obviously, this was too much for us to eat at one sitting, so we vacuum sealed it up for a later meal.

Which was today. But then we couldn't decide how to reheat it without turning it into a hard mass of gray shoe leather. Again, the internet to the rescue.

For a perfect reheat, we kept the meat in it's sealed bag (or you could use a regular plastic bag, just squeeze all the air out and seal it really well). Then you let your tap water run hot (about 140 degrees, NOT boiling). Then you simply put the bagged meat in a large bowl and cover it with the hot water (you may need to put a weight on it to keep the meat stays submerged). Check the water temperature after fifteen minutes, and add more hot water if needed. You'll want to leave the meat submerged for about thirty minutes. Then, when you open up you bag, your meat will be warm through (not hot, but a little au jus will help with that).

And surprise! Your leftover prime rib will be just as soft and tender as when you originally served it, and the meat will taste as fresh as it did the first day.

Hope you're all enjoying the holidays.

Saturday, December 11, 2010

Yum . . .

.
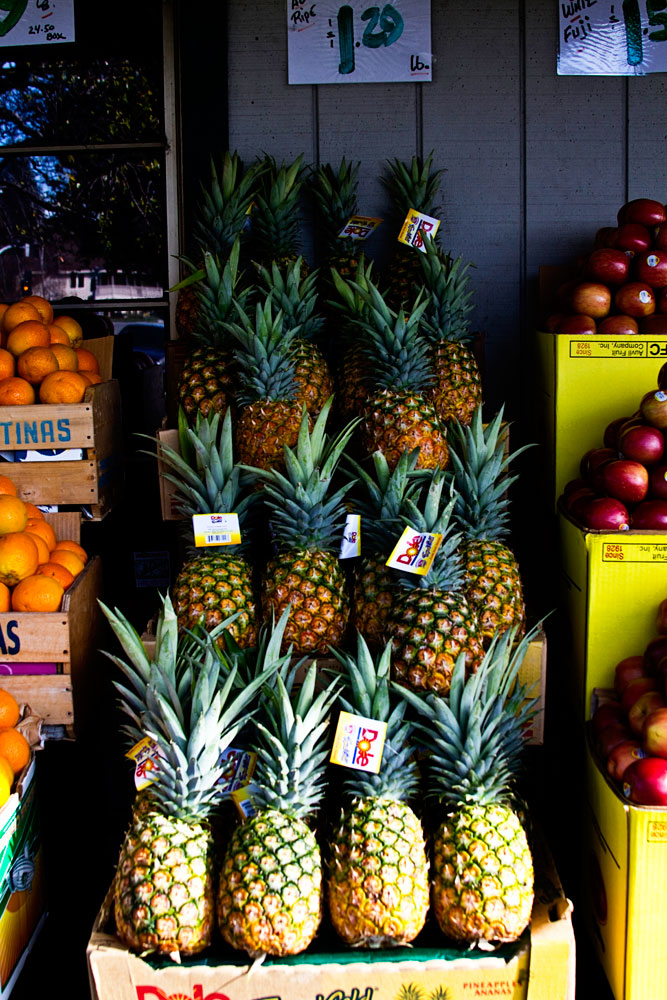
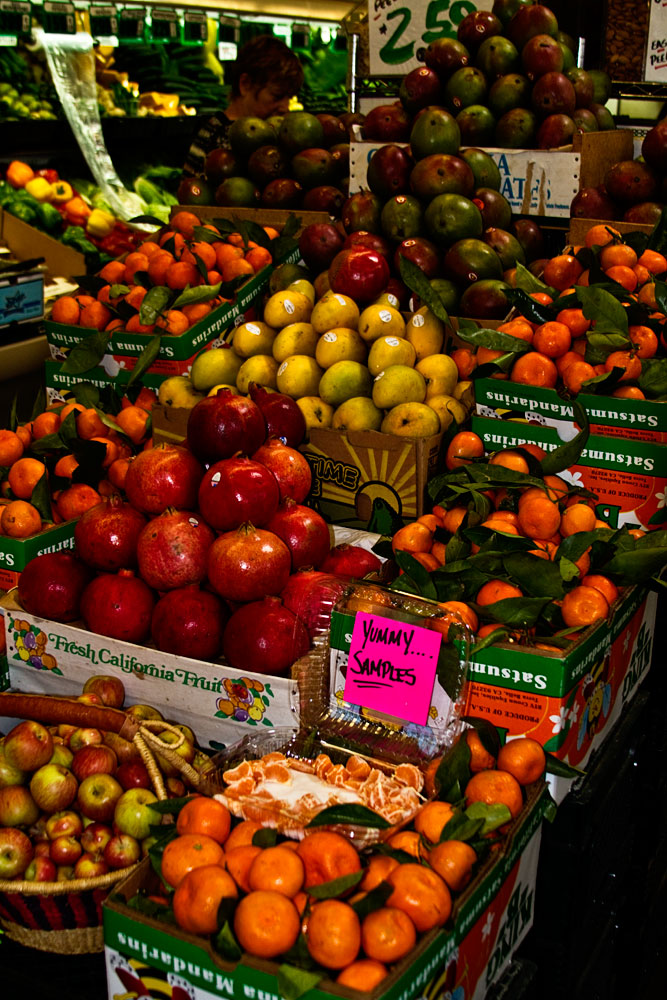
I went out to the fresh fruit and veggie stand today. I still haven't gotten used to the abundance of fresh produce here in California.


The colors and assortment
just cries out for me
to take out my camera.


And I love
how everything glistens right after
they spray it with the fine mister.

But then, I'm easily amused.


I came home with a bunch of Brussels Sprouts. I've written about them before because we love to bake them, which is a wonderful way to eat them.

But lately, rather than heating up the oven, I've been doing something similar on the stove top, and they come out just as good.

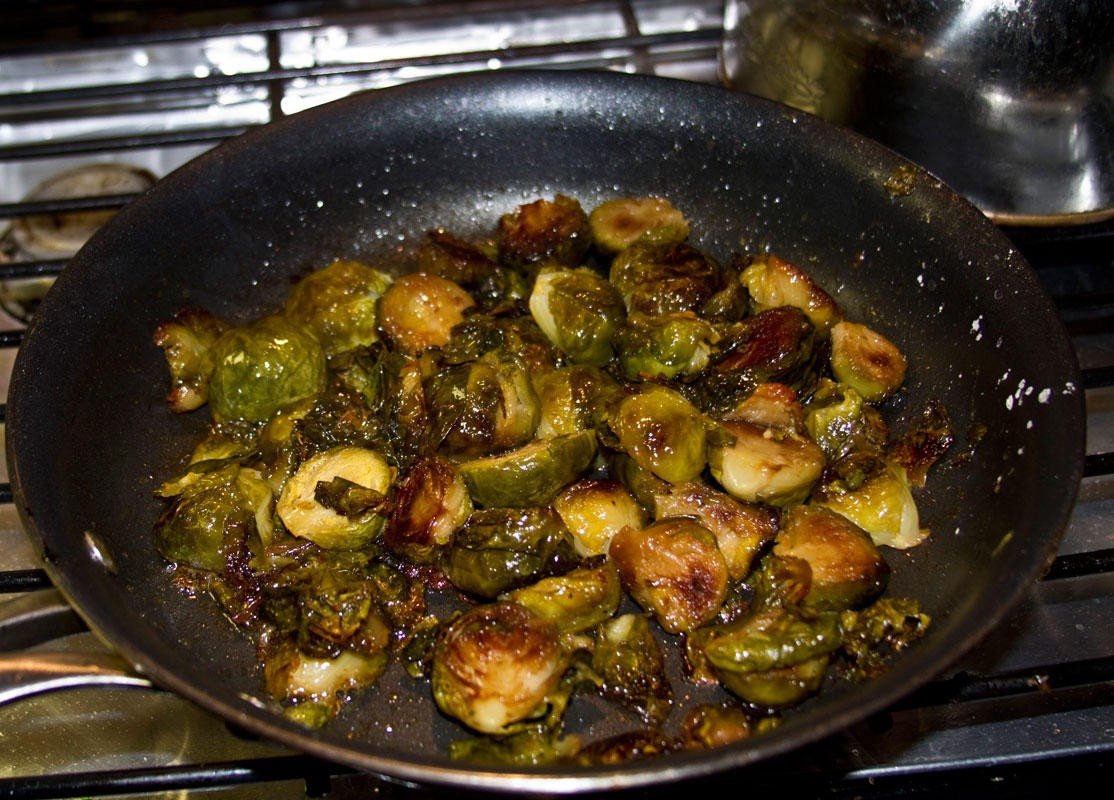
I start out by removing the stem and then cutting them in half.

Then melt a bit of olive oil and butter in the bottom of a frying pan and place each sprout half, cut side down, in the pan.

The heat should be medium low.


Now plop a loose cover on the pan and let them go for anywhere from 10 to 20 minutes. Once there's a nice color on them, toss them around in the pan,
add a good amount of salt, and continue to cook (tossing every 5 minutes or so) until they look like this.

They should be a bit al dente. These are slightly crunchy on the outside and sweet and buttery on the inside. You can even serve them to people who don't usually like Brussels Sprouts, they'll be surprised. You may never steam them again.

While I'm talking cooking, I'd like to make a comment on salt, Lately, I've been using a variety of salts, and are they ever a treat.

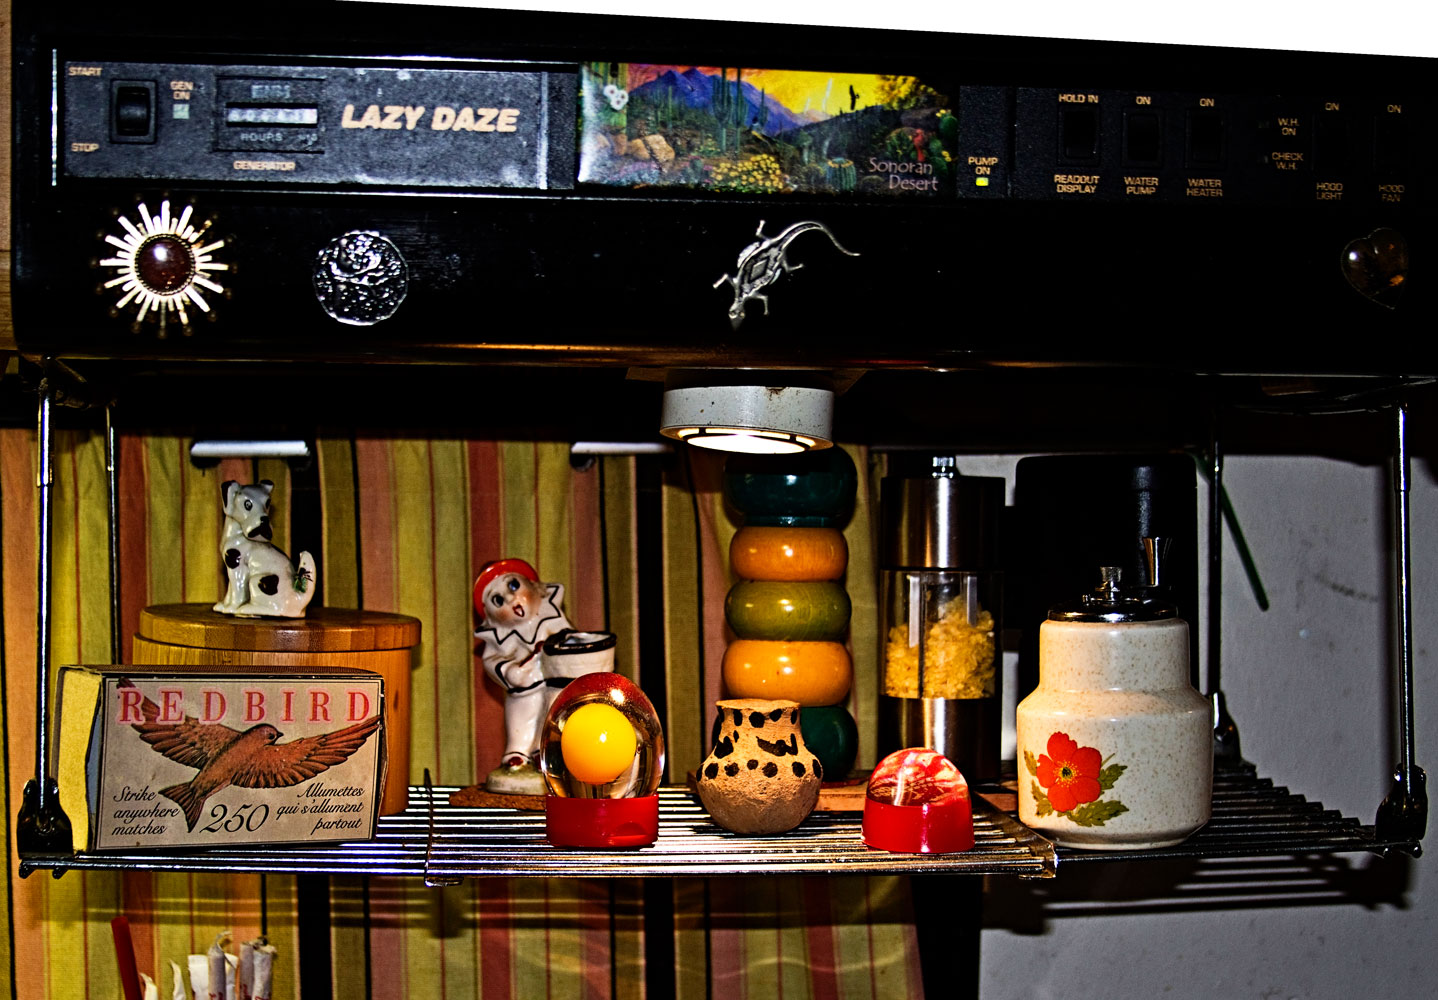
Here's a photo of the shelf above my stove.


The big box on the left rear is Kosher salt. We keep it in this bamboo box and just grab it by the pinch for cooking. The multi-colored grinder has a combination of dehydrated garlic and kosher salt. The yellow salt is a lemon salt that has a wonderful flavor. The white container on the right has Anglesey Sea Salt. It's a finishing salt from Great Britain. I like to put just a dusting of this on my veggies right before serving.

Since I've been playing with different salts, I'm kind of amazed at the difference they make, so I thought I'd share.

Saturday, May 22, 2010

Cole Slaw, New Mexico Style

.
Well, I have to admit that nobody jumped on my offer of Low Crab Recipes, but what the hey, I'm going to post one anyway.

We have discovered a new (to us) restaurant here in Santa Fe that makes the most wonderful barbecue. Not only is their meat smoked and cooked perfectly, but they seem to find the meatiest ribs I've ever seen. And they're consistent in both quality and quantity.

Now when it comes to barbecue, the sides are usually the downfall for a person who is trying to eat low carb. Corn on the cob, french fries, baked beans, potato salad, they're all off the plate the way we're currently eating.

Then the Green Chile Cole Slaw caught my eye, so I added it as my side of choice. And WOW, was this ever good. As I was eating it, I was trying to figure out the ingredients (I can't help myself, it's what I do).

There was no sweet to it at all, but instead it was creamy and rich, very yummy. The green chiles gave it an additional flavor and punch that made it perfect. They seemed to add really an extra level of flavor that sent the dish it right over the top.

When we got home, I immediately started playing in the kitchen. My first batch started with thinly sliced cabbage. For the dressing, I used s couple of tablespoons of mayonnaise, a like amount of green chiles and some chopped up cilantro. It was OK, but not quite right.

Now before I go on, I'd like to say a few words about New Mexico green chile. I don't want to bum any of you out, but if you don't have access to fresh roasted (then usually frozen immediately) New Mexico green chile, then you have missed one of the sublime tastes in the universe. They are like the perfect fruit (yes, the chile is a fruit), bringing out the best in a variety of other foods while still maintaining their unique flavor. I'm not knocking Anaheim chiles, or poblano chiles or any of the others you may find. I just wish I could explain to you just exactly what it is that makes a New Mexico chile different from any other taste in the universe, but trust me, once you've tasted it you understand immediately.

All right, enough blathering about the glories of New Mexico green chile, back to the slaw.

I tasted the slaw and started all over again. This time I used mayonnaise, but added a bit of sour cream to make it smoother. I also increased the green chile to equal the amounts of mayo and sour cream. I used a complete bunch of cilantro (chopped very fine), added some garlic powder, a squeeze of lemon and put in about four drops of Cholula Sauce.

Once I dressed the cabbage, I tasted it, added a bit of Kosher salt and a good amount of fresh ground pepper, and it was perfect!

If you're tired of the same old sweet cole slaw, you might want to give this spicier version a try. And one more thing . . .

If you don't have the advantage of true New Mexico Hatch chiles, take a look in a local ethnic market and you might be lucky enough to find frozen Hatch chiles in their cases. If you cant find them frozen, you could go with the small cans of chopped, but you may need to add a bit more Cholula to get the kick.


Wednesday, January 27, 2010

Ropa Vieja

A few years ago, we had dinner with friends and they made us a lovely Cuban dish called Ropa Vieja (Spanish for "Old Clothes").

I had forgotten about it until I ran across a bunch of recipes for the dish while searching the internet for something to cook in my pressure cooker.

Now I have to wonder how I could have forgotten this delicious stew!

As always, I add a little of this and that and change most recipes, but I found the base recipe on the Food Network.

I'll include the regular recipe and tell you what I did in my version.

Ingredients for Ropa Vieja

1 1/2 pounds boneless beef chuck stew meat
(I used closer to 3 lbs, what I had on hand)
2 teaspoons dried oregano
(I didn't measure, but I used a LOT more)
2 teaspoons ground cumin
(again, I didn't measure, but LOTS more)
Kosher Salt and Fresh Ground Pepper
Olive Oil
1 14 oz can whole tomatoes
(Mine, this plus about 3 cups fresh, chopped)
2 carrots cut into 1 inch pieces
(Mine, about 5 large carrots)
1 large onion, halved and sliced
(I diced the onions)
-Actually Terry diced the onions-
3 tbsp tomato paste
4 cloves garlic, minced
(Mine, about a dozen cloves)
1 bay leaf
1 green bell pepper, diced
1 red or yellow bell pepper diced
(Mine, 5 red bell peppers)
1/2 cup halved pimento stuffed green olives
(Mine, about 1 1/2 cups)
1/2 cup fresh chopped parsley

LOTS of ingredients, but well worth it.

Now on to cooking . . .

Make sure the meat is dry, so the spices stick better. Season the meat with the oregano, cumin, salt and pepper, then brown well in olive oil. Use lots of spice, this is the basis for the yummy broth.

When all the meat is brown and crusty (you may have to do this in batches), add the tomatoes, carrots, onions, tomato paste, half your garlic, a bay leaf and 1 1/4 cups water.

Now I made mine in a pressure cooker, but I'm sure this could be made in a slow cooker, or on top of the stove. In a pressure cooker, bring it up to high, and when your pressure is up, lower the heat to keep it at medium high for about half an hour. You want the meat to be nice and tender.

While this is cooking, saute the bell peppers and remaining garlic in a bit of olive oil.

When the meat is done, stir in the cooked peppers, the olives and the fresh parsley.

Now, be prepared to sit down to a flavor combination the likes of which you wont believe. When I make this again (and I will be making it again), I'll leave out the parsley, because I've decided that fresh parsley is disgusting, but that's a personal decision. I will also add even more garlic, probably a few potatoes and maybe more carrots (Terry loves carrots).

Serve this with some fresh hot No Knead Bread and I can guarantee that you'll be adding this your recipe book.

Yum!

Thursday, January 21, 2010

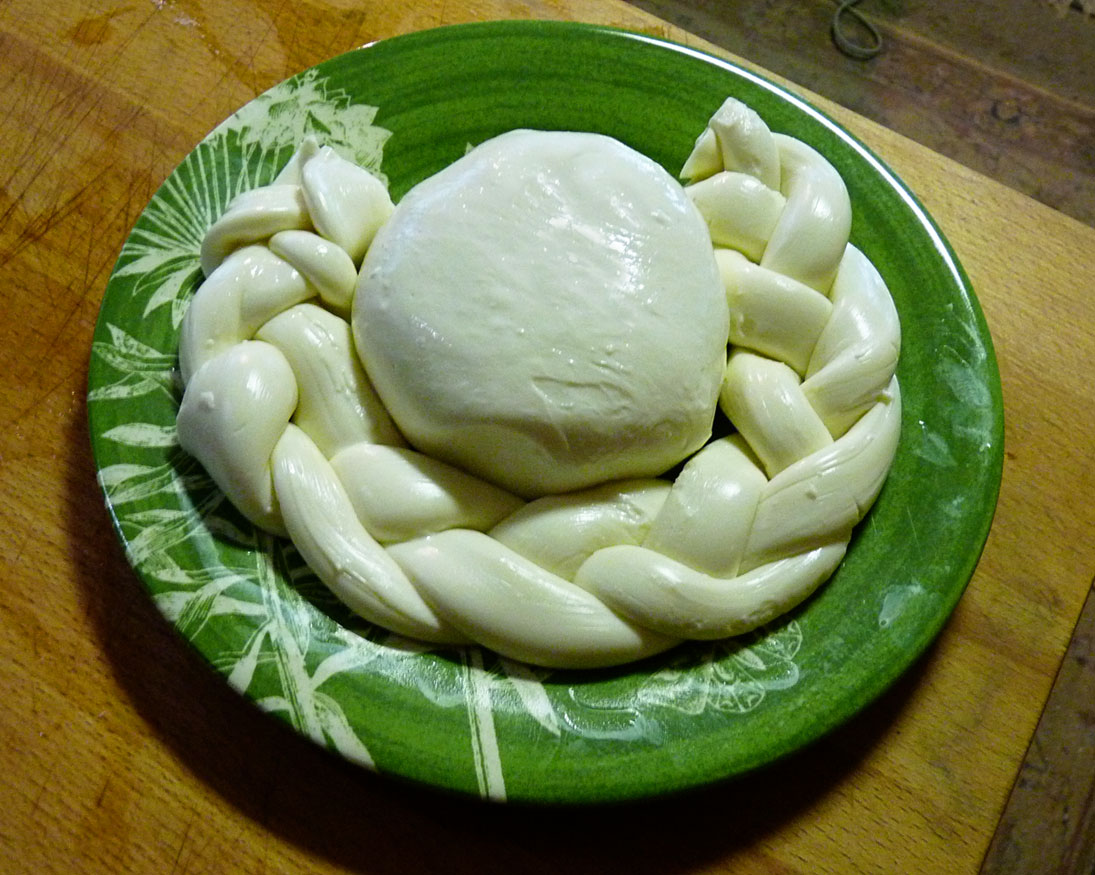
I Made Cheese!

.
So here I am, looking around the internet, and I see a reference to making your own cheese. I immediately dismiss the idea, since we live in about 200 square feet.

But the idea keeps nagging . . .

What's wrong with me? I'm a go-to kind of girl, what's with this negative thinking? Of course I can do it! After all, I cook all kinds of things in this compact little kitchen. I bake bread, make cakes and pies, roast beefs, make huge pots of chile verde, so why not cheese?

I look into it a bit further.

There are literally hundreds of sites covering this subject, but finally, due to the fact that we're currently in San Antonio, New Mexico, population 719, it looks like the easiest way to get what I need is via the internet.

To be honest, all you need us whole milk (fresh would be better, but I can't seem to find a local dairy), rennet (tablets or liquid), citric acid, a decent thermometer and salt. I'm sure that in a large city all of these would be readily available, so if this inspires you, get on the phone and track them down.

For myself, I went online and found this Mozzarella and Ricotta Cheese Making Kit.

At the market, we bought homogenized, pasteurized (NOT ultra pasteurized) milk and this morning, we set out to make us some fresh mozzarella cheese.

We started early, because even though they say it only takes thirty minutes, these things usually take me a lot longer.

That said, with the instructions from cheesemaking.com, in about forty five minutes, we had perfect mozzarella cheese!

The site is great (they don't call her the Cheese Queen for nothing). After looking around, I discovered it was her kit that I had purchased (although I'm sure you could get the ingredients locally).

So now I can add cheese making to my repertoire, what a hoot!

As an added bonus, apparently the whey is packed full of nutrients, so I now have a pound of beans soaking in the whey for later.

I see a dinner consisting of a big old pot of beans, some homemade bread and fresh cheese in our immediate future, perfect for this overcast day.

I think I'll try flavored cheese next.

Monday, January 11, 2010

a Couple of Pictures (and a Recipe)

.
When we spent our day in downtown Albuquerque, I took quite a few photos of the area. Everyone always goes to Old Town, but I really like the regular downtown area a lot. A wonderful mix of older buildings combined with an open ambiance makes it a swell place to spend the afternoon.

I liked the symmetry
of this fire escape.


There are many such signs
lining old Route 66


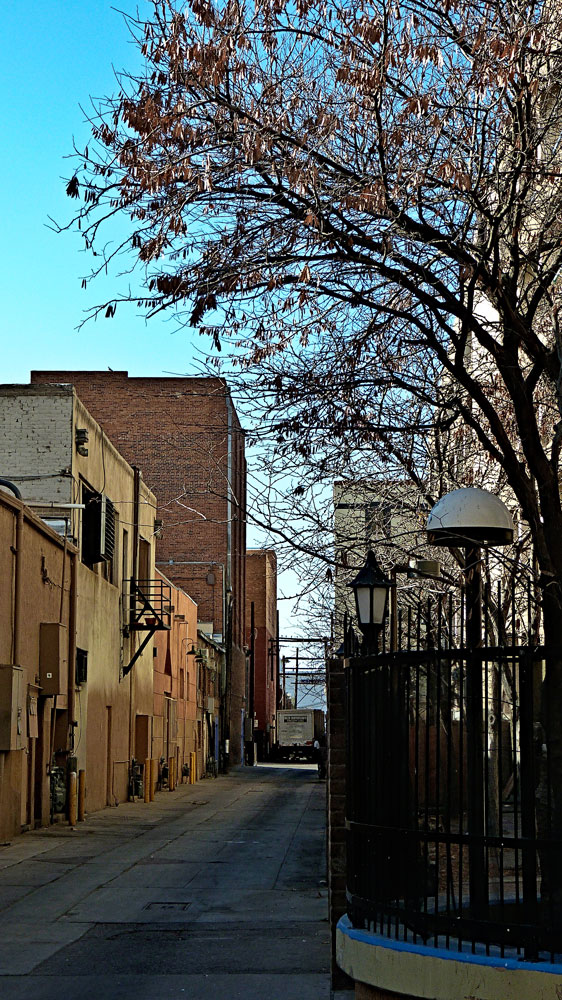
Lots of small alleys
holding hidden treasures


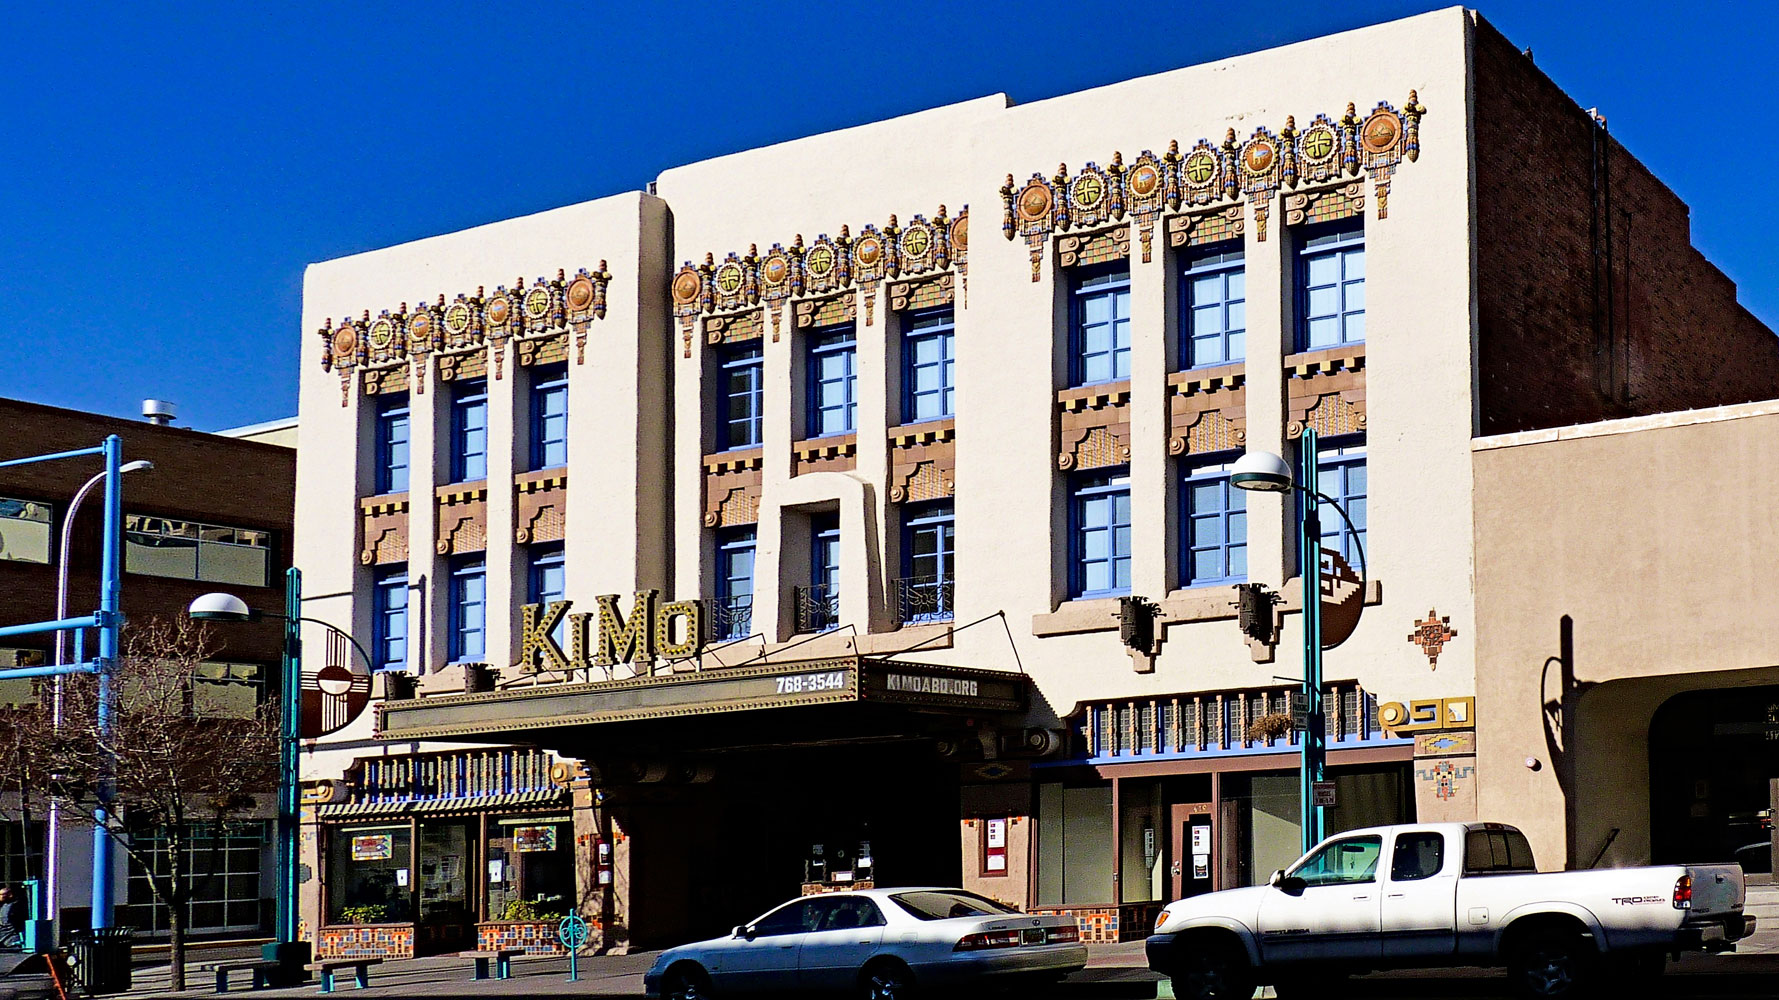
The jewel of downtown Albuquerque
the Kimo Theater


The detail on this old beauty
is something to behold


They really knew how to do it
in 1927


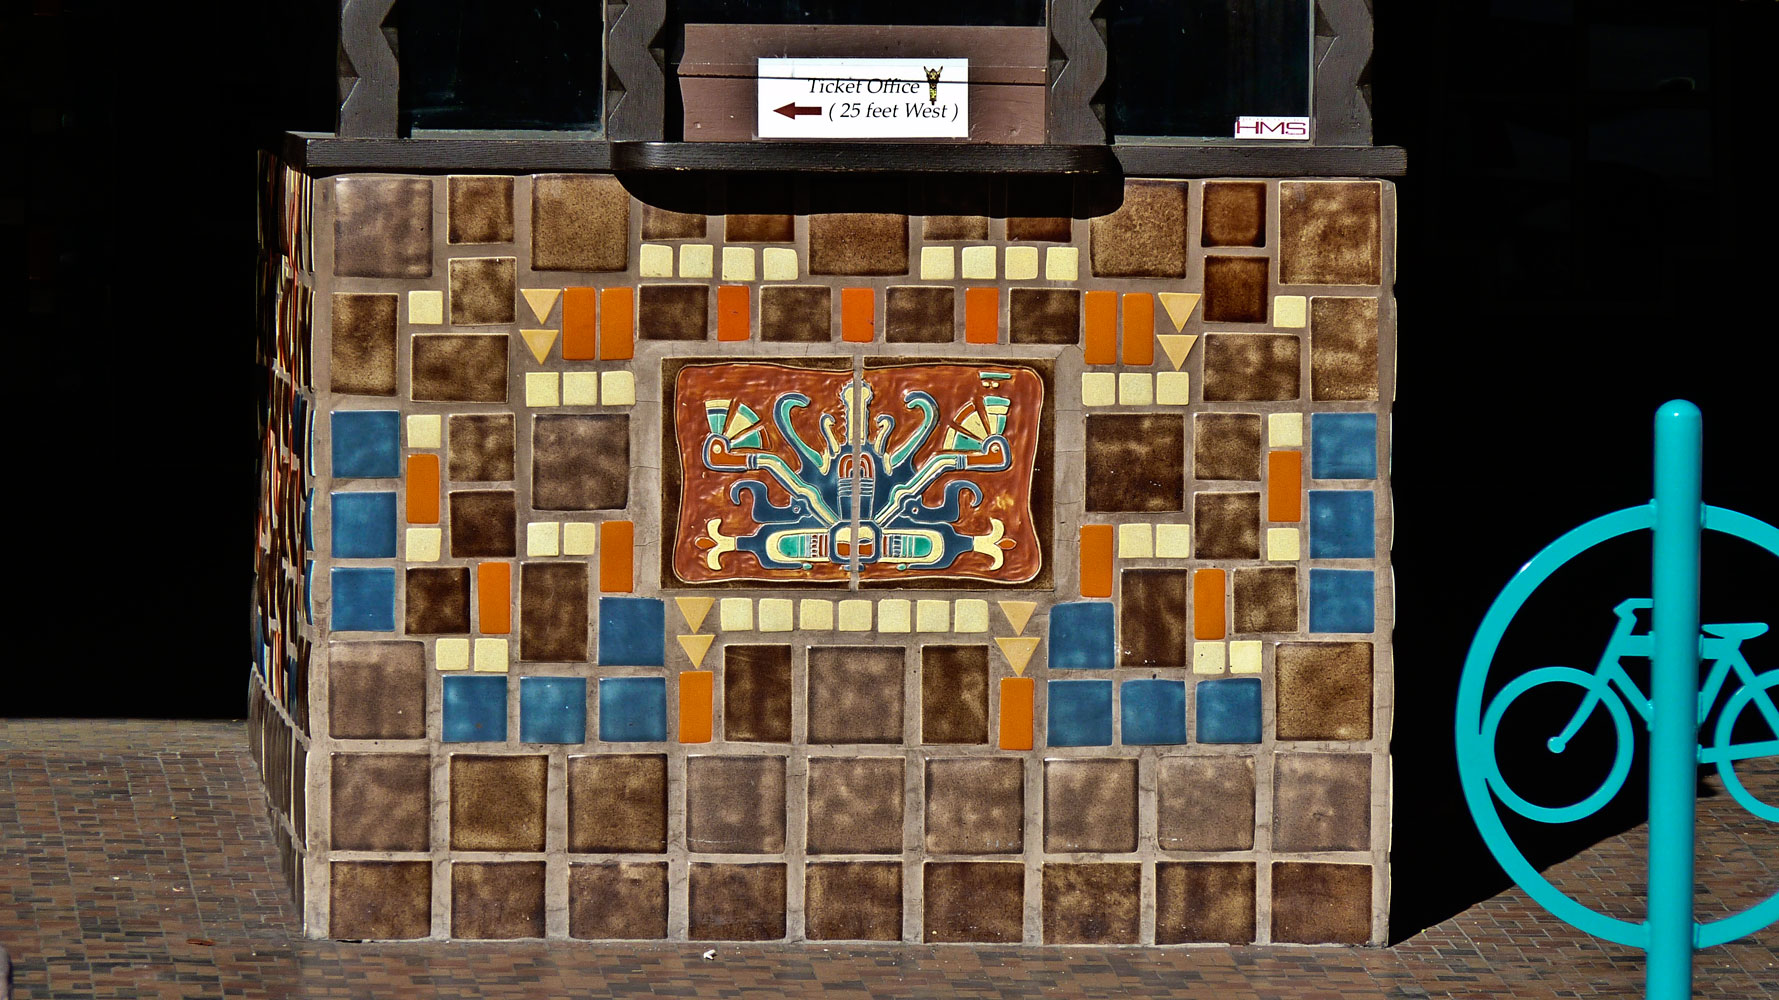
Such detail


Right down to the metal masks


-The Box Office-
This would have been
a better picture
if I would have paid attention
and not cut the bicycle sign in two
Note to self
Pay Attention!


This shapes in this shot
appealed to me


Even the window covers
are beautiful


This building
is right down the street
from the Kimo.
I just can't resist this kind of shot.


Next time you find yourself in Albuquerque, take a bit of time away from Old Town and look around. I think you'll be pleasantly surprised.

I also promised you a recipe, so here goes.

Since we've been in New Mexico I've rediscovered hominy. It's used in many dishes (mainly Posole, a real taste treat).

Not too long ago we attended a potluck and tasted a hominy dish that was the hit of the party. I just this evening reconstructed it, and while I don't have it perfected, it was quite tasty, so I thought I'd share it with you.

Hominy Green Chili Casserole

2 cans white hominy, drained
1 4 oz can diced green chili
(Hatch brand preferred)
8 oz sour cream
2 cups sharp cheddar, grated

Basically you put everything together (reserving a bit of the cheese for the top of the casserole) and put it in a 350 degree oven till set, about thirty minutes.

Now for my suggestions . . .

Next time, I think I'll cut the sour cream in half, substituting either cream cheese or goat cheese. This is somewhat like a Mac and Cheese so I think I'll also add a bit of fresh nutmeg and a healthy hit of red pepper. Maybe some dry yellow mustard and a different selection of cheese might kick it up a bit also. Maybe add something (bread crumbs, crushed chips, whatever) to the top to give it just a bit of texture. The taste is very good, but can be made even better, I'm sure.

If you try it and find something great to add, let me know. While the dish is pretty yummy, there is always room for improvement. We'll definitely have this again and as it progresses I'll keep you posted.