Showing posts with label Lazy Daze. Show all posts

Wednesday, April 11, 2012

the Rig

.
Huzzah! Today we had some work done to the rig.

A week or so ago, our refrigerator started freezing everything. This has happened before, when we first got the motorhome and it was fixed under warranty. Now, six years later, the warranty is long expired, so we knew we'd have to spring for a fix.

From previous experience, we knew it was either the thermistor or the board, or possibly both.

In looking around, we saw that thermistors have vastly improved from the one installed in our fridge. Instead of a small wooden match-head sized unit, they now look like a thin tube of lipstick. Much better for sensing ambient temperature. Finding this, we decided no matter what, we were getting a new thermistor.

As to the board (which turned out to be the problem), we've heard for years that Dinosaur boards are much preferable to Dometic boards. For starters, Dinosaur boards come with a three year warranty as opposed to the ninety day warranty offered by Dometic. The Dinosaur board also has an external temperature setting, so that's what we went with.

While our repairman was here (aren't we lucky to have a mobile tech who comes to the rig?) we talked about our water pump.

Several years ago, our Shurflo 5.7 finally failed (years after a lot of others of that model). At the time, it was an emergency situation and fortunately (having heard of the Shurflo 5.7s high failure rate) we had a spare, a generic pump that we had purchased at Camping World. After a good friend installed the spare, I dealt with Shurflo.

While our 5.7 pump was well out of warranty, I persisted (are those who know me surprised?) and finally got Shurflo to send me a free replacement pump. They sent us the Revolution, which is what they ship in place of the faulty 5.7s.

For a few years now, we've carried the Revolution, making do with the other replacement, because we aren't all that handy when it comes to plumbing. That said, the replacement has been a huge pain in the heinie. The flow is poor, giving adequate water, but pulsing instead of providing an even flow.

Since we already had the replacement on hand and the repairman at the rig, we decided this would be a perfect time to have it installed.

Now we're happy campers!

Our water is flowing and our food is cold.

And once again,

Monday, December 12, 2011

Our Catalytic Heater

.
Now that winter is upon us, there's been quite a bit of discussion of catalytic heaters over on the Lazy Daze board. While many folks have mounted their catalytic heaters (usually an Olympian Wave) permanently, we had ours installed so it can be moved, or put away entirely.

With this discussion, several folks have asked for pictures of our setup, so I decided that I would do an entry here on the blog. If you're not an RVer, this might not be of any interest to you (or maybe it will?). Anyhow, you have been warned.

When we first got our catalytic heater, we got a Wave 6 figuring that bigger is better. A few uses disabused us of this notion, and fortunately, we found friends who were amenable to a trade.

For mounting, we decided on a quick connect valve, but we knew we wanted a hard wired on/off valve. A bit of scouting around found the best spot for this was under the kitchen sink. We could hook in to the propane line for the stove, and we could use the empty space under the kitchen drawers as a place to store the propane hose when not in use.

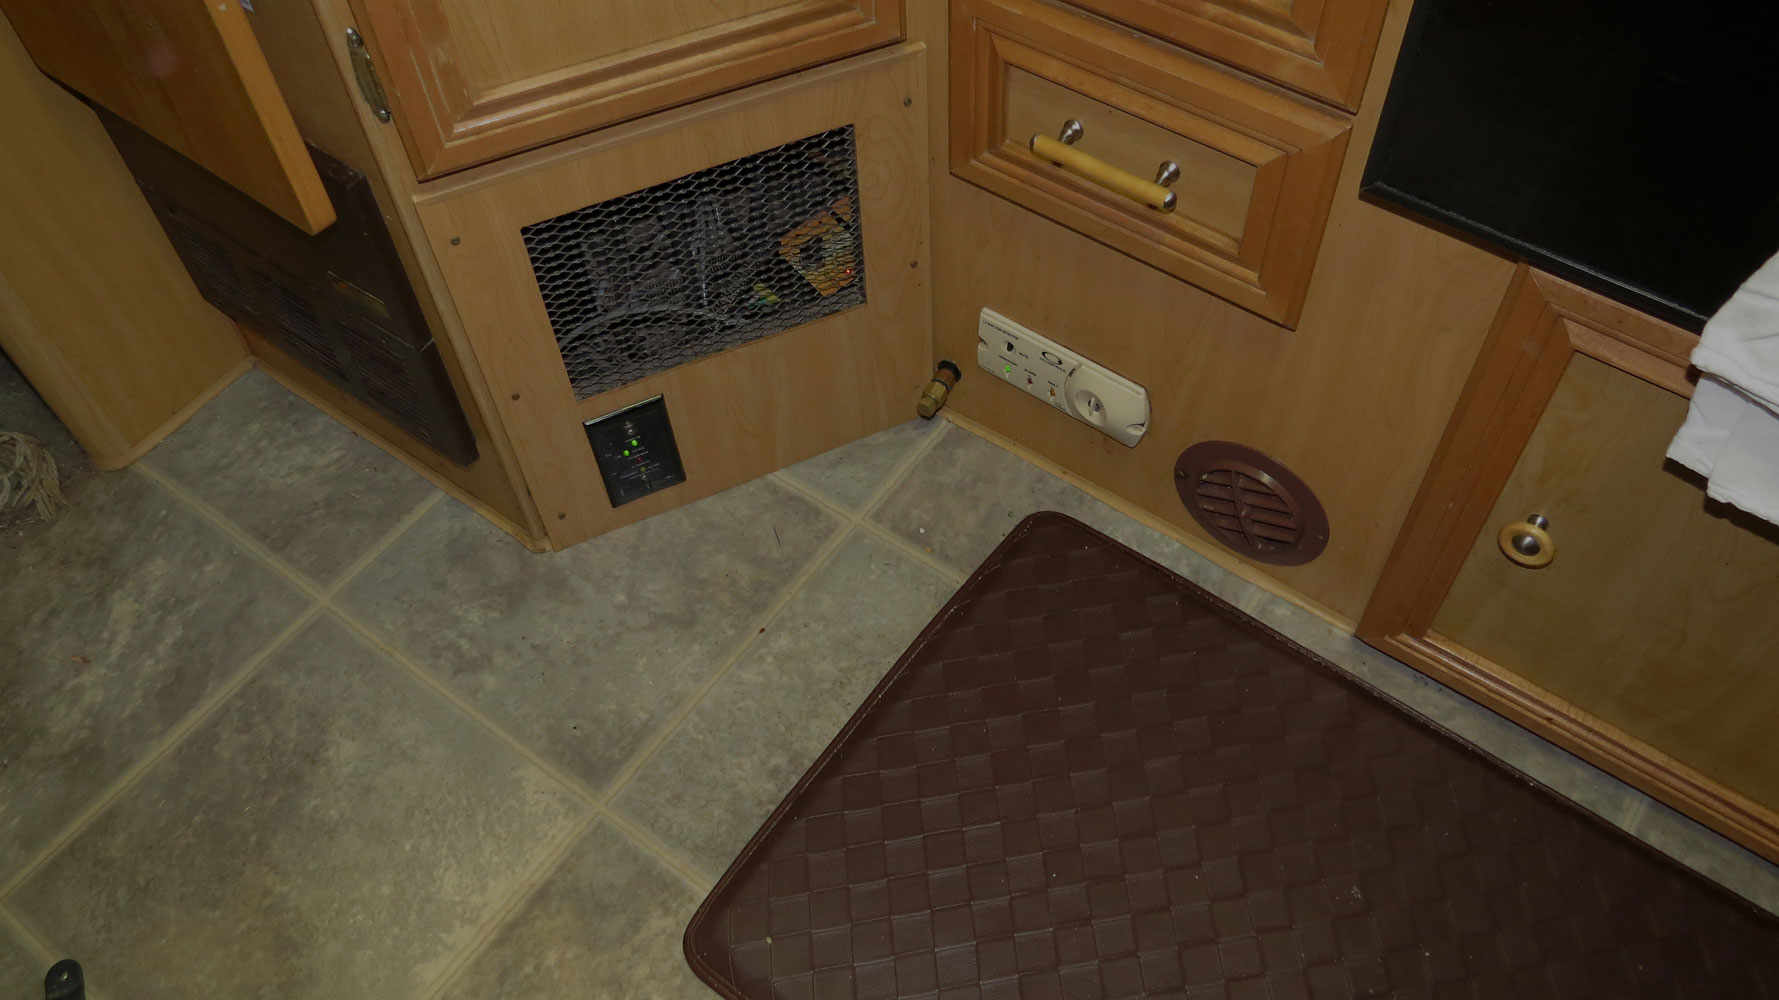
Here's a picture of the connection to the propane. The red handle is the shut off valve. We make it a practice to turn the propane off at this valve every time we turn the catalytic heater off. Pardon the dust, I do my very best to keep this clean, but it's kind of intimidating with all this electrical equipment!

You can see the actual heater hose extending from the cabinet face next to the propane detector.


Here's a shot of the area when the heater is not in use. After use, we simply push the hose back in the area behind the cabinet. As you can see, the hose sticks out just a bit, but it's pretty inconspicuous. You'll also see that the screened cover is back in place under the sink. Originally, this panel was screwed into the wood, but we removed it, then sawed off the screws flush and glued them in place (this pleased me cosmetically). Then we simply placed velcro on the back of the panel and the front of the cabinet. It holds the panel in place just fine, but others may find a cleaner solution for attaching the panel.


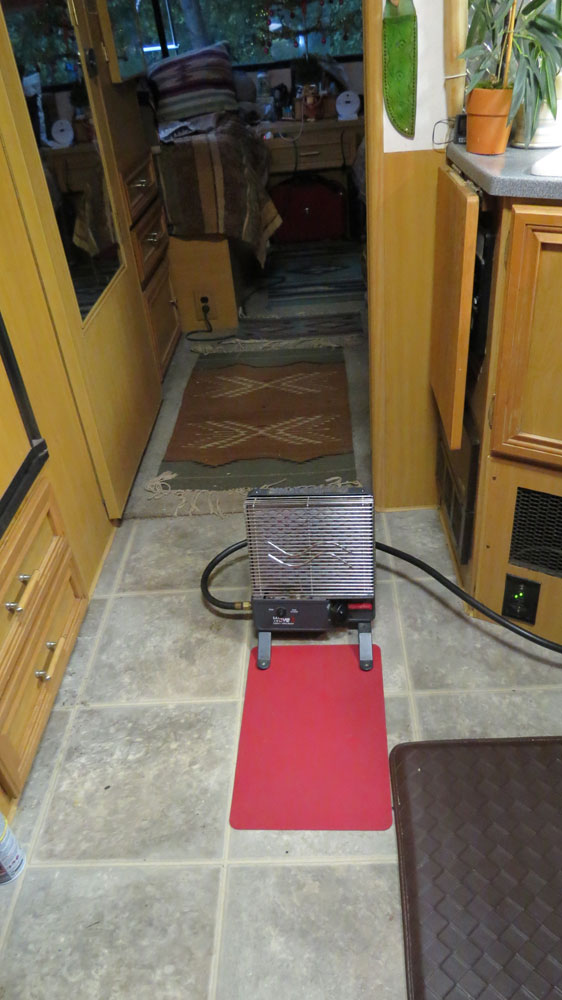
Here's a shot of the hose when it's extended and attached to the heater for use. While it looks like it's in the way, it's never been a problem for us. The hose is somewhat stiff, and we always know when it's in use. We've had this setup for over five years now and it works well for us.


Usually we start with the heater facing the front of the motor home. We usually put it in the kitchen as you see here, but it can be moved forward into the actual living area if we like, due to the length of the hose. You'll notice a red mat under the front of the heater. This is a silicon baking pad. While the heater doesn't put out a lot of heat straight down, sometimes, we feel it gets a bit warm in front of the heater. The silicone pad simply makes sure no extra heat reaches the flooring in front of the heater.


After a while, when the rig is nice and toasty, we'll take the heater into the bedroom area and face it towards the back of the rig.


One huge advantage of the catalytic heater is that it requires no battery power to run. It's also extremely efficient on propane, and quite small.

I should also mention that it's important to always have ventilation when using a propane heater. We open the vent in the bathroom, which seems to offer plenty of airflow. We also turn it off at night (we never sleep with the propane heater running). Also, we always turn it off when we leave the motorhome.

We use our Olympian Wave 3 about 80% of the time. The furnace is awful handy, but it's very noisy, pretty inefficient and uses a good amount of both propane and battery power.

Thursday, December 1, 2011

Windy . . .

.
I'm sure happy we're living in the motorhome.

We seem to be in the midst of a pretty violent windstorm. The power went out last night and as of 9pm, is still not happening. I can hear the wind whistling, the trees groaning and the debris scuttering along the ground.

But here in the rig, we're snug and warm.

How well I remember when we were living in the big house, what a pain it was when the power went out. We still had heat, but no lights, no computer, no internet. Scrambling for batteries, tripping over my messes.

Now, here in the rig, it's really not that much of a bother.

That said, I find the wind and its' accompanying noise bothersome. Makes me wish I wasn't under all these trees!

I always think back to when we were first in New Mexico and I got a taste of what a real windstorm was like . . .

You can read about it here.

Wow, reading that, I seemed to be so much more in touch with everything when we were on the road. Now I seem more numb to my surroundings. Just reading that post makes me itch to leave this place.

Snap out of it!

There is one good thing I'm noticing during this storm. Since we've switched our lights over to LEDs, we use hardly any power at all. We've used all the lights we wanted, both last night and throughout the day into this evening and still, the batteries read 94% . Not bad at all. While it was expensive, it sure seems worth it at times like this.

We still have the stock fluorescents that Lazy Daze installed at the build, but one of these days I'll get around to changing those too. For now though, all our tiny fixtures have been switched to LEDs. I love that they burn so cool, the halogens were so hot, I was always worried about heat build up.

I'm reading this and I guess it's kind of indicative of my state of mind.

Wandering, scattered, wistful and ready to leave.

Still, I look across the rig and see my sweet mans face and know that everything is all right.

I'm going to hit "publish" before I ramble even more.

Friday, September 30, 2011

Pictures

.
As I said before,
I had a lovely time on my little getaway.

It was so great to be among
so many fine women RVers.


If any of you Lazy Day ladies
ever get the chance to go to one of these events,
you really should attend.
It's enlightening, educating
and just a whole lot of fun.

This is a shot of Lorna,
she's responsible for
the LaDeze get-togethers.


One day, my friend Nancy and I
took off on an adventure.
We spotted a sign for a place called Wildlife Images.
We had no idea what kind of facility it was
and decided we needed to find out.

As we pulled in to the parking lot,
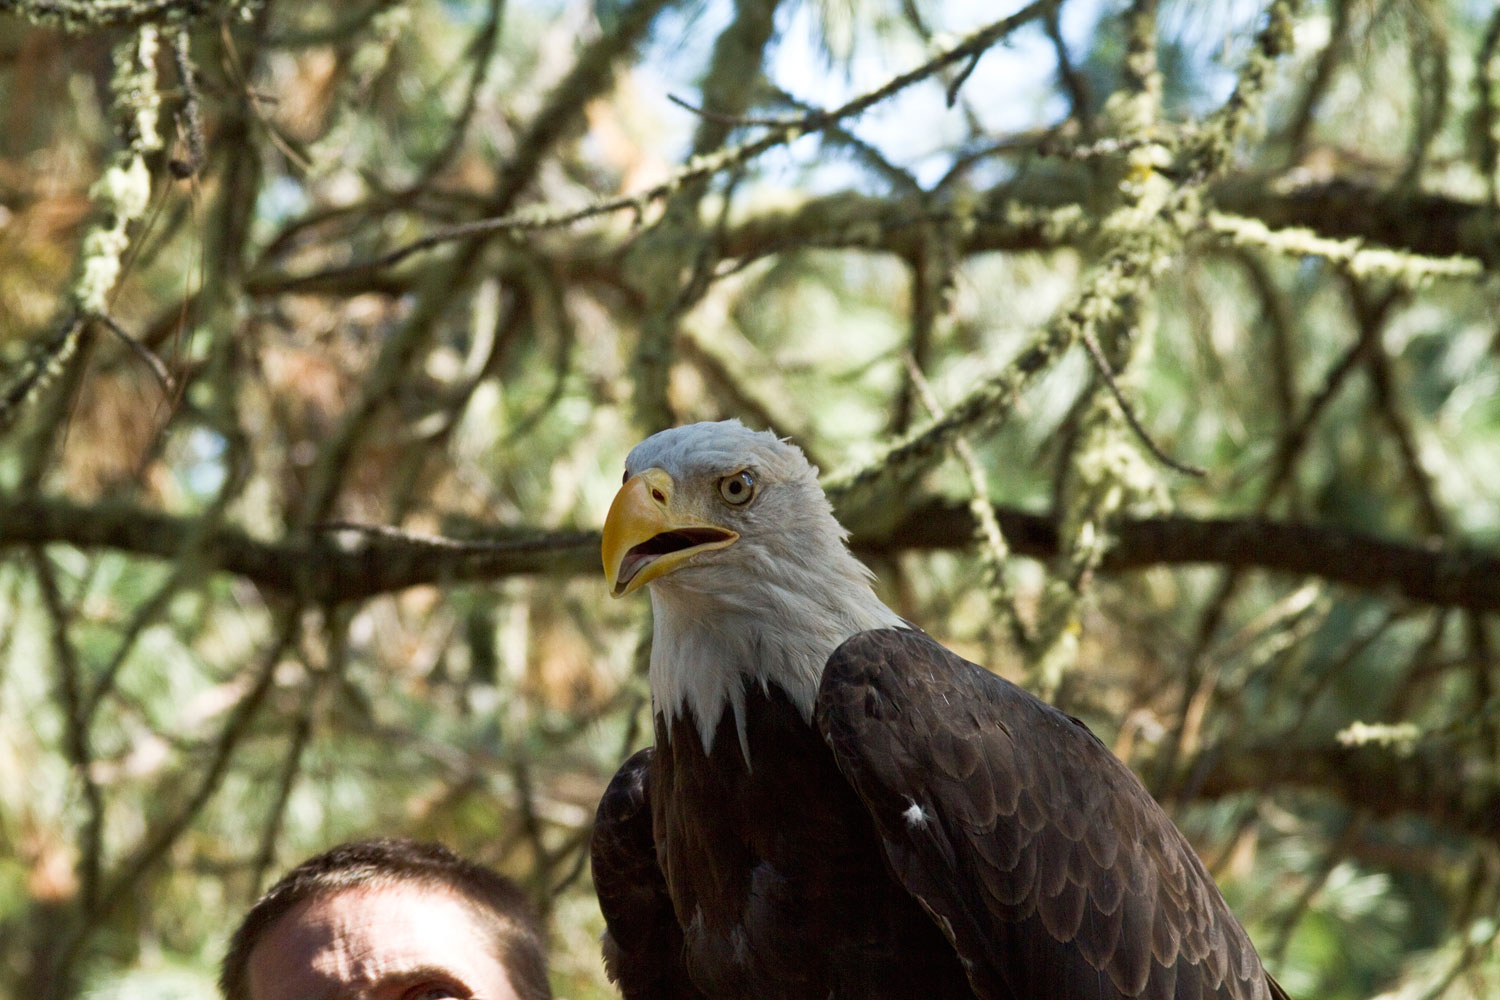
look who came out!


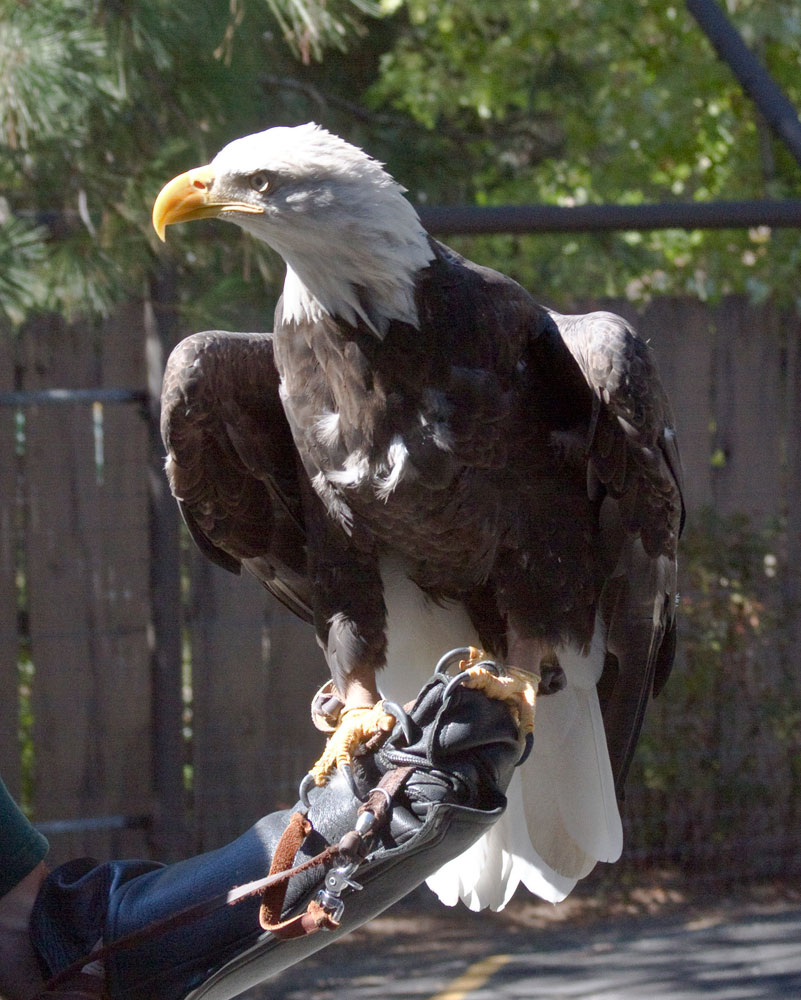
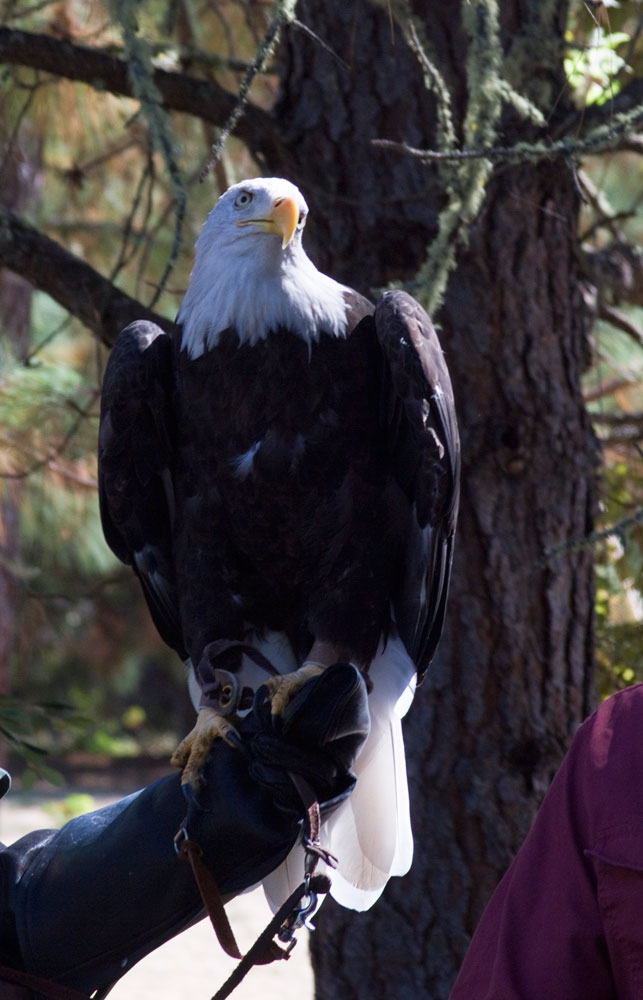
His name is Defiant.
It turns out that Wildlife Images
is an animal rescue organization.
They return a full 80% of their rescues back to the wild


I took a ton of pictures during our visit.
Somewhere along the way,
I changed my camera setting
to manual focus instead of auto focus.


At least I thought I did.
It was only later that I discovered
I had hit the image stabilization button,
totally disabling image stabilization . . .

And the reality is,
I can't hold a camera still to save my life.
So when I got home and looked at the pictures,
a full 99% of them were less than ideal.

MUCH less than ideal . . .

So there are just a few
that are even presentable.

I liked this one and it's even in focus!


And for some reason,
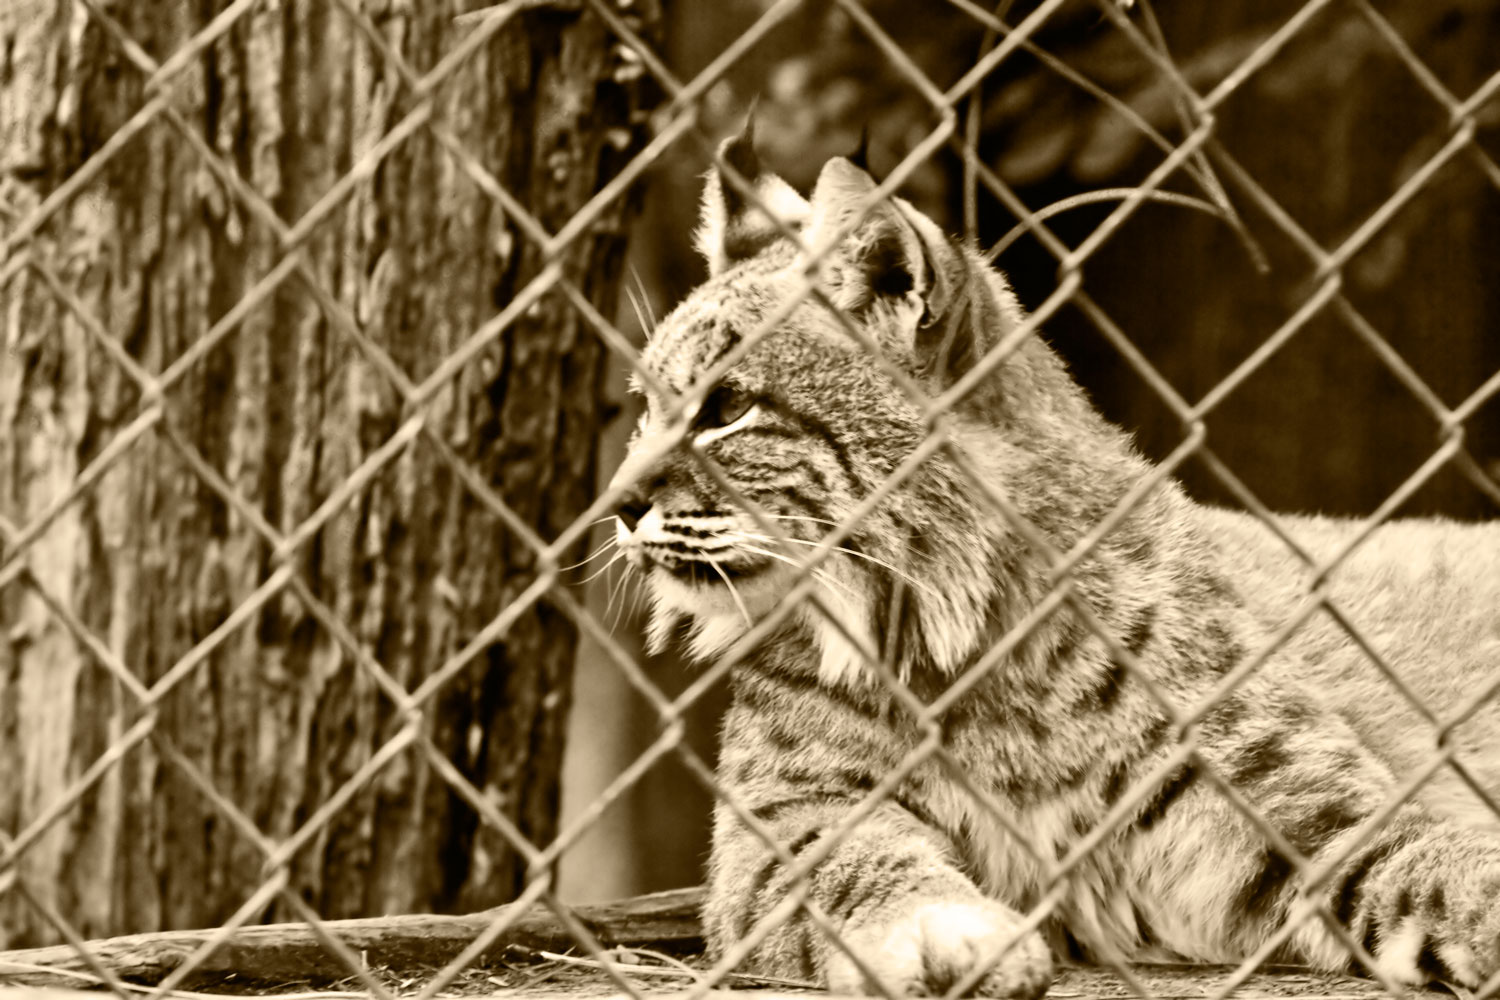
this one cat was in focus.
Sort of.


Since I had so little to work with,
I reworked this one.


The next day, I had much better luck,
but that's for another blog.

Monday, June 20, 2011

Refrigerator Tube Caps (for the RVers Out There)

.
Over on the Lazy Daze board, we've been discussing refrigerators. A few posts ago, I discussed cleaning my refrigerator (you can read about it here if you care) and it seems that many rigs don't have the little cap that we have on our drain tube. Several folks have asked about it, so I decided the easiest thing to do would be to post a picture.

It's not really clear in the picture, but there are perforated holes in the cap.


That’s All For Today!


Saturday, May 28, 2011

Snow White (and the Refrigerator)

.
I think I mentioned our DVD player died. In looking at a new one, we decided to get a BluRay player, even though we don't have an HDTV. I have a couple of BluRay discs and today I took my first look at this technology. I have to admit, it looks pretty darned good.

But it wasn't the technology that got me, it was the film.

Wow, Snow White and the Seven Dwarfs. I know that most people look at it and scoff, but it gets me every time. I always think back to the time it was created and what a tremendous achievement it was.

Remember, this was the first time anyone attempted to engage an audience using characters who weren't portrayed by live actors.

And engage them it did.

I remember talking with animators who worked on the film about the first showings. According to them, when those seven little men were standing around that glass coffin, there wasn't a dry eye in the house. It's a pretty powerful piece of film making.

I look at the character of Snow White and I am enamored of how lovely she is. Over the years, as a Disney collector, I've gotten used to seeing still pictures of these characters, and this is how I seem to think of them. It slips my mind that they are meant to be seen in motion, that's why they call it animation. Duh.

While I know that many people make fun of the voice of Snow White, I always remember that it is exactly the way that Walt Disney wanted his very first heroine to sound. And when you look at pictures of a young Adriana Caselotti (only 19 at the time), it's obvious that they based the look of Snow White on her fair beauty.


I had the pleasure of knowing Adriana later in her life, and she carried the delight of this character with her to the very end. If you haven't seen this classic film in a while, I urge you to give it another look. And if you have any little ones in your life, make time to introduce them to this classic.

* * * * * *
Now on to a completely different subject. This is for all you RVers out there.

Today I cleaned out my refrigerator. While our refrigerator is a good size, it's no where near the size of a household appliance, so it needs to be cleaned pretty regularly. While I've done this for all the time we've had Cholula Red, today I found something I've overlooked for the last five years.

When you clean an RV refrigerator, you want to clean the set of metal fins that sit at the upper back. Below these fins is a short removable shelf, which has a tube/vent that leads to the outside. This is where the condensation runs out of the fridge. What I've missed all this time is that right where the tube attaches to the back of the fridge, there's a small catch cup. Today, when I looked in this catch cup, it was full of slimy yucky goop. How had I missed this all these years? I don't know, but I won't ever miss it again!

I also went outside and checked where the fridge actually drains below the fridge. This opening has a small perforated cap and this was also clogged with goop. After cleaning both of these openings, I blasted a bit of canned air till the tube ran clear.

If you have an RV fridge, you might want to check these the next time you clean your refrigerator. Or maybe everybody else already knew about this?

* * * * * *

That's it for today.

Saturday, April 2, 2011

Take a Look at This!

.
We have a friend who has a friend that has to sell her wonderfully unique Lazy Daze because it isn't running right now. She loaned it to a friend who blew the engine, bad friend!

Now, before we go any further, let me say right up front that this isn't the rig for everyone. It needs work, and has been modified in ways that wont be to everyone's taste.

Still, I think it has a boatload of charm, and if you like to tinker and have the heart of a gypsy, this just might be the motorhome for you!

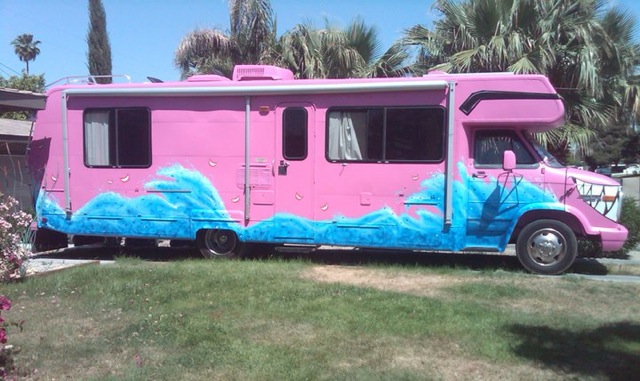
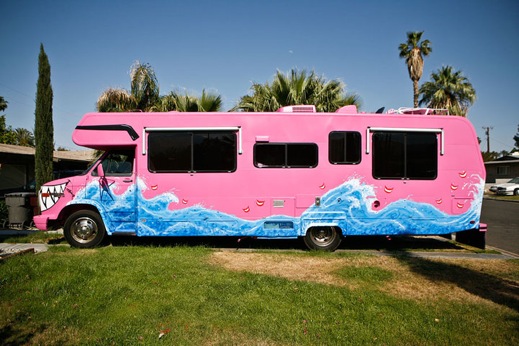
This is a 1994 Lazy Daze, 30-foot island-bed. It has 83,674 miles, new tires, and the roof has been resealed with eternabond. Receipts from the last year totaling $5,500 are available (a list of the repairs is included at the bottom of this post). This rig is very clean, inside and out.

The first modification
is a totally new paint job.
Using incredibly realistic
artists' renderings of ocean waves,
this rig will not be confused
with the run of the mill Lazy Daze!
(The paint is a good quality exterior house paint
over two coats of primer).


I LOVE the sunglasses, and have asked Terry if we can add them to Cholula Red. He's still undecided . . .

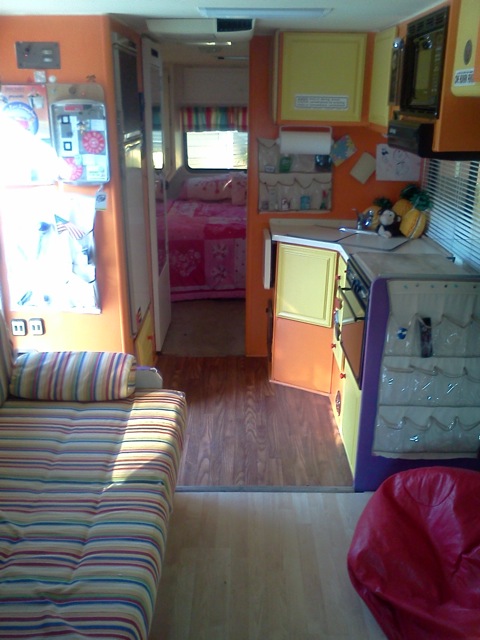
Okay, let's take a tour of the inside. Lots of these changes are things we are considering for Cholula Red somewhere down the line, especially the interior paint.

Here's the kitchen,
looking towards the rear bedroom.


Here's a shot of the living area.


Since the original owners had dogs, the flip up table has been neatly and cleanly removed. The carpeting has been removed, with pergo laid down in the living room.

Here's the bathroom.
Wow, it looks so roomy.


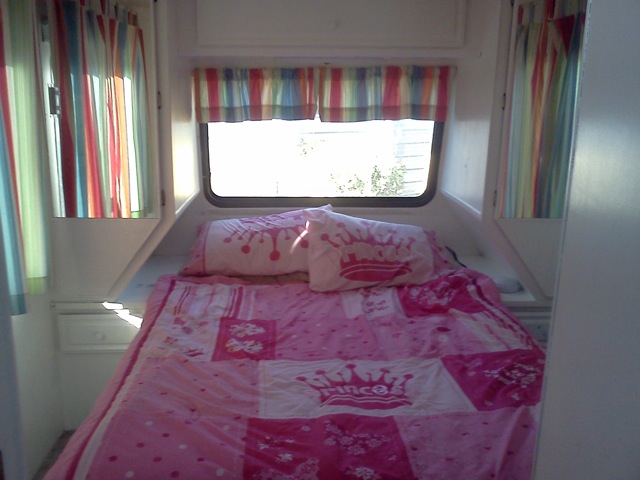
And here's the bedroom.
I really like the way the bedroom curtains
reflect in the mirrored doors.


Finally, here's a view of both sides,
passenger


and driver.


So it's a unique rig that is looking for a new home, probably with someone who is into fixing up cars, motorhomes, etc.

The price is $9,000 or best offer.
She really needs to get rid of this,
so if you are at all interested,
make an offer.
You never know,
it just might be accepted!
The rig is located in the Palm Springs area.

If you're interested, contact

Shann Carr
760 202 0404
Girlmoxie at aol dot com


Repairs and work done include:
Ultra Premium Severe duty rear brakes
Sway Bar Bushing set- front suspension/ Stabilizer Bar Control Link
New Fuel Pump (MFG OEM _74074) As this is an in tank pump, the gas tank was cleaned when dropped.
Fuel Pump Pressure switch
Fuel Pump stainer
Fuel Filter (Gold) for both chassis and generator
Fuel Cap
Throttlebody, fuel injection, valve train cleaning
EGR Valve and gasket
Radiator cap
Temperature Control Valve
Heater Valve
Valve stem extensions for tires

Tuesday, March 15, 2011

RV Power for Dummies

.
As promised, here we go with some very basic information on power in your RV.

Remember, if you know much of anything about electricity, this is not for you. You already know all this!

For the beginner, this will seem like a lot of info, but I've tried to keep it simple. Just read it over a couple of times and hopefully it will help you to begin to understand the electrical power in your RV.

Before I go any further, one note . . . If you are ordering a new rig (probably a Lazy Daze) I think one of the most important options you can pay for is to get as many 12 volt (Direct Current or DC) and 110 volts (Alternating Current or AC) outlets as they will give you. It's been my experience that they're never where you want them, so I like having them everywhere! We got all they would allow, and still had to put more in!

OK, back to basics.

110 volt power is what you have in a regular house. It comes from the power poles that feed into your outlets. You access it via a regular 2 prong plug (or sometimes a 3 prong plug). If there are three prongs, the flat ones supply the power, and the bottom round prong is a ground plug. Don't ask me to explain ground plugs. I don't really understand them (and I don't really care), but I know they're a good thing.

12 volts is what is supplied to your RV by way of your battery bank. In your RV, if you're sitting out in the middle of nowhere, you're running off of 12 volt power supplied by your batteries. Think of those little plugs that go into your cigarette lighter in the car. This is a 12 volt outlet.

In most newer rigs, the 12 volt plugs up in the front of the cab are powered by the cab battery. This cab battery is located under the hood, by the engine. The house batteries, which power the lights, etc. in the living quarters of the motorhome are located somewhere in the "house body" of the motorhome.

One short note about house batteries. They come in two types, flooded cell and sealed (AGM or gel cell). If you have flooded cell batteries (and most rigs come with flooded cell batteries) you must maintain them by checking that they have enough distilled water in them. If your batteries don't have enough water, they will die a premature death. There are many ways to water your batteries but that's another subject. Just remember that this is a crucial step in preserving your power. KEEP YOU BATTERIES WATERED!!!

If you have replaced your flooded cell batteries with AGMs or gel cel, they are sealed and never need water. There are many advantages to sealed batteries, but they are considerably more expensive than flooded cells. Since most RVs come with flooded cell batteries, that's what I'm going to talk about here.

So here you are, out in the desert, relying on your batteries for power. You can only use lights and appliances that are 12 volt, so nothing that uses a regular 2 prong plug will work. Most RVs use 12 volt lights, so you can use them, but remember, they are drawing power from your batteries.

If you want to use regular 110 volt items (DVD players, some TVs, charge your computer, etc.) you need to buy an inverter.

An inverter takes the 12 volt power from your batteries and changes it into 110 volts. Inverters come in several models, portable and hard wired. A small portable inverter plugs in to your 12 volt outlet, but contains regular house plugs that take the 2 or 3 pronged plug. Different inverters can handle different amounts of power, so before you buy one, you need to do a bit of research. We opted for a hard wired full house inverter, so with the flick of a switch, all the 110 volt outlets in Cholula Red are "live". When we don't need this feature, we simply turn it off.

Depending on how much power you consume, you eventually will need to charge your batteries. This can be done in one of three ways.

One option is solar. Solar is a great boon to RVers and we love having it on Cholula Red. We have four panels, giving us lots of battery power, assuming we have the sun to power them. That said, solar is somewhat expensive, and not for everyone. While we often have hook ups, we have found that solar gives us the opportunity to camp at places with no power for extended periods of time. I look at solar as an addition that opens up options. It does a great job of charging the batteries, but since it's an option rather than a standard item, I'm only mentioning it here for informational purposes.

So back to talking about charging your batteries.

You can run your cab engine. This will charge your batteries via the engines alternator, and it's fairly efficient. HOWEVER, it's noisy, it pollutes and it uses a good amount of gasoline, so it's really not the best option.

If you have a generator, you can charge your batteries that way. It also uses gasoline, but not as much as the engine (they say about 1/3 of a gallon per hour, I've never checked). But there's a catch to charging the batteries via the generator. In order for your generator to charge your batteries, it has to use a device called a charger. And chargers come in various models.

Most RVs come with a plain charger as part of the built in converter. It takes the power made by the generator and it puts it in to the batteries. But here's where it gets tricky. Your batteries are sensitive, and they only want to take so much of a charge. If you overcharge them, they start to boil. When they boil, the water goes away and all of a sudden, your batteries are out of water . . .

And remember, YOU WANT TO KEEP YOU BATTERIES WATERED!!!

So here's where you might want to consider a smart charger. Not only does it charge your batteries, but it communicates with them. It knows when the batteries are low and need a lot of charge and it pumps the power in at a fast rate. When it reads that your batteries are getting close to full, it backs off to a lower rate of charge. And when it reads that your batteries are near to completely full, it goes in to a trickle charge mode.

Three stage "smart" chargers are a real boon to RVers and I think a necessary upgrade in most rigs.

Now I want to talk a bit more about the power in your batteries. Now that you understand that the power comes from your batteries to your appliances, the question comes up, how do you know just how much power is left in your batteries?

The answer is simple.

You need a battery monitor.

Short story here . . . When we first got Cholula Red, I was truly clueless about RV power. I understood that I didn't understand, and I wanted to learn. But when people would try to explain to me about power, they would start talking amps, volts and watts, and honestly, my eyes would just glaze over.

Regular readers may remember me talking about my brain missing the photo gene. Well, I'm also missing the electrical gene. I just want to understand the basics, and I want to know how much power I have/need/use.

I could care less about the math (and hence, this article).

But I did know that I was using a lot of power and I wanted to know where I stood. After all, we were running lights, watching television, playing DVDs, charging phones, computers, you get the idea. I wanted to know when my batteries were getting low, and I was completely clueless about how to find that out. Several people had told me that I could get this information from my solar controller (the device that monitors/controls the power from your solar panels to your battery). The catch was this- it would only give an accurate reading when there was no power going into or coming out of the batteries. And when would that be? Yep, I would find myself getting up in the middle of the night, turning on my flashlight and sneaking up to the display, trying to figure out how much power was left in the batteries.

There had to be a better way, and there was.

We got a battery monitor.

Now, with the push of a button it tells me that I have exactly 83% left in my batteries (or whatever the percentage is at any given time). Not only that, if I want to make sure my three stage charger is working, I can turn on the generator and see how much power is going in to the batteries (without using the 3 stage charger). Just as an example, say the number is 6 (amps, watts, whatever). Then by turning on the 3 stage charger, I see that all of a sudden my generator is putting in 59 or whatever. That's how a smart charger should work.

For me, managing the power in the RV became pretty simple after I got the battery monitor. If you don't want to have to learn all the math, it's the easiest way to manage your power.

___________________________

So that's pretty much my introduction to the electrical power that's used in an RV. I hope it helps someone, and if you have questions, please feel free to get in touch.

One more thing . . .

If you go out in your RV, and don't have a generator or solar power, then you must learn to conserve, or resign yourself to parking in places that afford you hook ups to electrical power.


Monday, March 14, 2011

We're Back

.
We're back at the house, and what a time we had!

We had great weather (and a tsunami warning!), and got to meet a ton of people. Morro Bay State Park is a lovely venue, and there were something like thirty five Lazy Daze, with the oldest being a couple of 1983 models.

One belongs to our friends Steve and Nancy who we met last fall in Capitol Reef and the other to our new friends Dorothy and Mikio. I have to say, with a little bit of care, these Lazy Daze rigs can go on forever!

I wonder if we'll still be in Cholula Red in 2033???

Time will tell.

Once again, we learned so much.

I think after looking at the upgraded lighting in Steve and Nancy's rig, I'll be switching out our halogens for super bright LEDs. I've been hesitant, because the cost is pretty high. But after seeing them in action, I'm convinced that they can give as much light with such an energy savings that, even with the high initial cost, it will still be worth it. When I get this project underway, I'll give you particulars here, in case any of you RVers are interested in making the switch.

Another thing I'm planning on writing is a small piece explaining electricity in an RV. Now, this won't be for you of you who know anything at all. This will be for the very rank beginner. The reason I'll be doing this is, the subject came up several times, and it seems that most people who try to explain 12 volts, chargers, generators, batteries, inverters etc, already know way too much, and just can't seem to dumb it down enough for us beginners.

It seems, since I only understand the very basics, I was able to explain it a bit to several people at the get together. It was suggested that I write it out for the blog, so hopefully I'll get to that soon.

I also have some pictures I took during our trip (not as many as I hoped, but hey, I was busy visiting!), so basically, this entry is just to touch base till I get around to really making a posting!

Friday, March 4, 2011

Well, YUCK!

.
Today we thought we should start getting ready for our little adventure next week. The rig has been sitting under the trees, getting sappy and dirty, it looks a fright.

So we gave her a wash and boy, did she need it.

Then we looked her over and decided to give her a bit of spit and polish. We don't do this as often as we should and I'm ashamed to say, she doesn't look as good as other Lazy Daze that are even older. They told us the red paint was a mistake (much more upkeep) but did we listen?

So soon, she may suffer a name change. Maybe Cholula Tomato Soup, or Cholula Dusty Rose? Whatever, she will always be Cholula Red to us.

So anyhow, we used a bit of Finish First prep, which helps with the oxidation. I say we used a bit, because we only got to one side of the rig, the door side, Then we put a bit of Finish First wax on that side, and by the time we were done with the one side, she looked wonderful, but we were too pooped to go any further. Still, we knew we had to do something about the cab of the rig.

Let me backtrack a bit here,

When we make camp, we use a mesh boot which goes on the outside of the windshield. This allows light in during the day, and while we can see out, people can't see in. When we wash the rig, that has to come off, and of course it was filthy dirty. Fortunately, that can go right in the washing machine.

While the mesh boot works great during the day, when it gets dark outside, we add a device called an Easy Curtain. This is one of my favorite tweaks for the rig. It's lightweight, yet completely blocks all light, yet for some reason, it seems to help with both heat and cold.

In addition to the boot and the Easy Curtain, when we're somewhere for an extended stay and it will be cold, we've made a curtain that attaches to snaps on the cab over. It's a heavy microfiber blanket that goes all the way to the floor and into the wheel wells. Using this makes the rig extra toasty and snug, especially in cold weather.

So that's been the set up here for the last couple of months, the boot, the Easy Curtain and the microfiber drop.

Now, remember a while back when we were talking about how moist the rig had become, sitting here under the trees? Well, as regular readers know, we got a dehumidifier, which has completely taken care of the problem.

At least, we thought it had taken care of the problem, never thinking about taking down the curtains we have in the front of the rig . . .

So we took down the microfiber plush and Uh Oh, this doesn't look good. We see some mold on the bottom, where it hits the floor, so into the washer it goes. Then we notice a bit of mildew on the Easy Curtain (another load for the washer . . .).

When we take the Easy Curtain down, I have to tell you, it looked like the mildew monster had taken up residence, YUCK!!! It was everywhere. On the dash, in the seat belt, on the window, the doghouse, the floor mats, everywhere.

Wow, this was really disgusting!

Fortunately, it cleaned up pretty easily.

But it leads me to ask the question, What do you folks who RV in the wet climates do? The Lazy Daze is very well insulated, including thermal pane windows and tons of insulation. But that didn't stop the moisture from collecting, especially in the cab area of the rig, where the insulation is the weakest.

I haven't read much about this problem on the online forums, but it makes me wonder.

And once again miss the beautiful arid southwest.

Anyhow, it's supposed to rain tomorrow, so we may never get the other side of the motorhome waxed.

So if you're reading this, and will be visiting us in Morro Bay, make sure you only look at the rig from the passenger side.That's the shiny one . . .


Monday, February 28, 2011

the Hunger Games

.
I know I haven't been posting for a few days, but I have a truly valid excuse.

I've been reading the Hunger Games.

Officially, this is considered a YA (Young Adult) novel, but I must say, it never felt like it was talking down to youngsters. If it hadn't been labeled as YA, I would have just considered it a great read.

It's a trilogy of books (including the Hunger Games, Catching Fire and Mockingjay). I haven't been so immersed in a series in recent memory. Now I'm sorry that I'm done with them.

I've never read the Harry Potter books (maybe I should?) and I tried the Twilight sagas, but found them pretty boring. This kept me from reading this series for a while, since I thought it was just a "kids book". But trust me, this is a fine adventure.

Set in a not too distant future, the characterization is superb, and the story involving. Speaking to various topics like ecology, war and reality television, it subtly weaves these themes without ever getting preachy. And I really loved the characters

If you have any other recommendations (YA or not), please share. I don't know what to read next!

I also wanted to mention that we've had visitors. Russ and Donna, who have just taken delivery of their brand spanking new 30 foot Lazy Daze stopped by for an afternoon on their way home to Oregon. If you'd like to hear more about their new rig and their adventures, (including pictures) you can read their blog here.

We took another load down to the auction today, but we want to start getting ready for our short vacation next week when we'll be visiting Morro Bay. We need to clean the rig, inside and out, and hopefully give her a bit of wax (maybe). If we can't get her spin 'n' span to our specs, well, what they hey, we're going anyway!

Hopefully, I'll get a bunch of pictures to share with all of you.


Sunday, February 14, 2010

The New Shelves

.
We've finally finished installing the new shelves, HOORAY!

Or is it shelfs? Whatever.

I might add that this is a motorhome targeted post, so if you aren't at all interested in RVs and such, feel free to skip it.

I love this modification, it's already made a huge difference. Now, we have an accessible place for all kinds of everyday things like hard drives for back ups, flashlights, all my little camera doodads, you get the idea.

I want to apologize for these pictures, they're pretty poor. I put them in the "for information only" category. The rig is only eight feet wide, and I wanted to get something up here, and if I used the flash they were even worse, you get the idea . . .

Yada yada blah blah blah, I know they're bad.

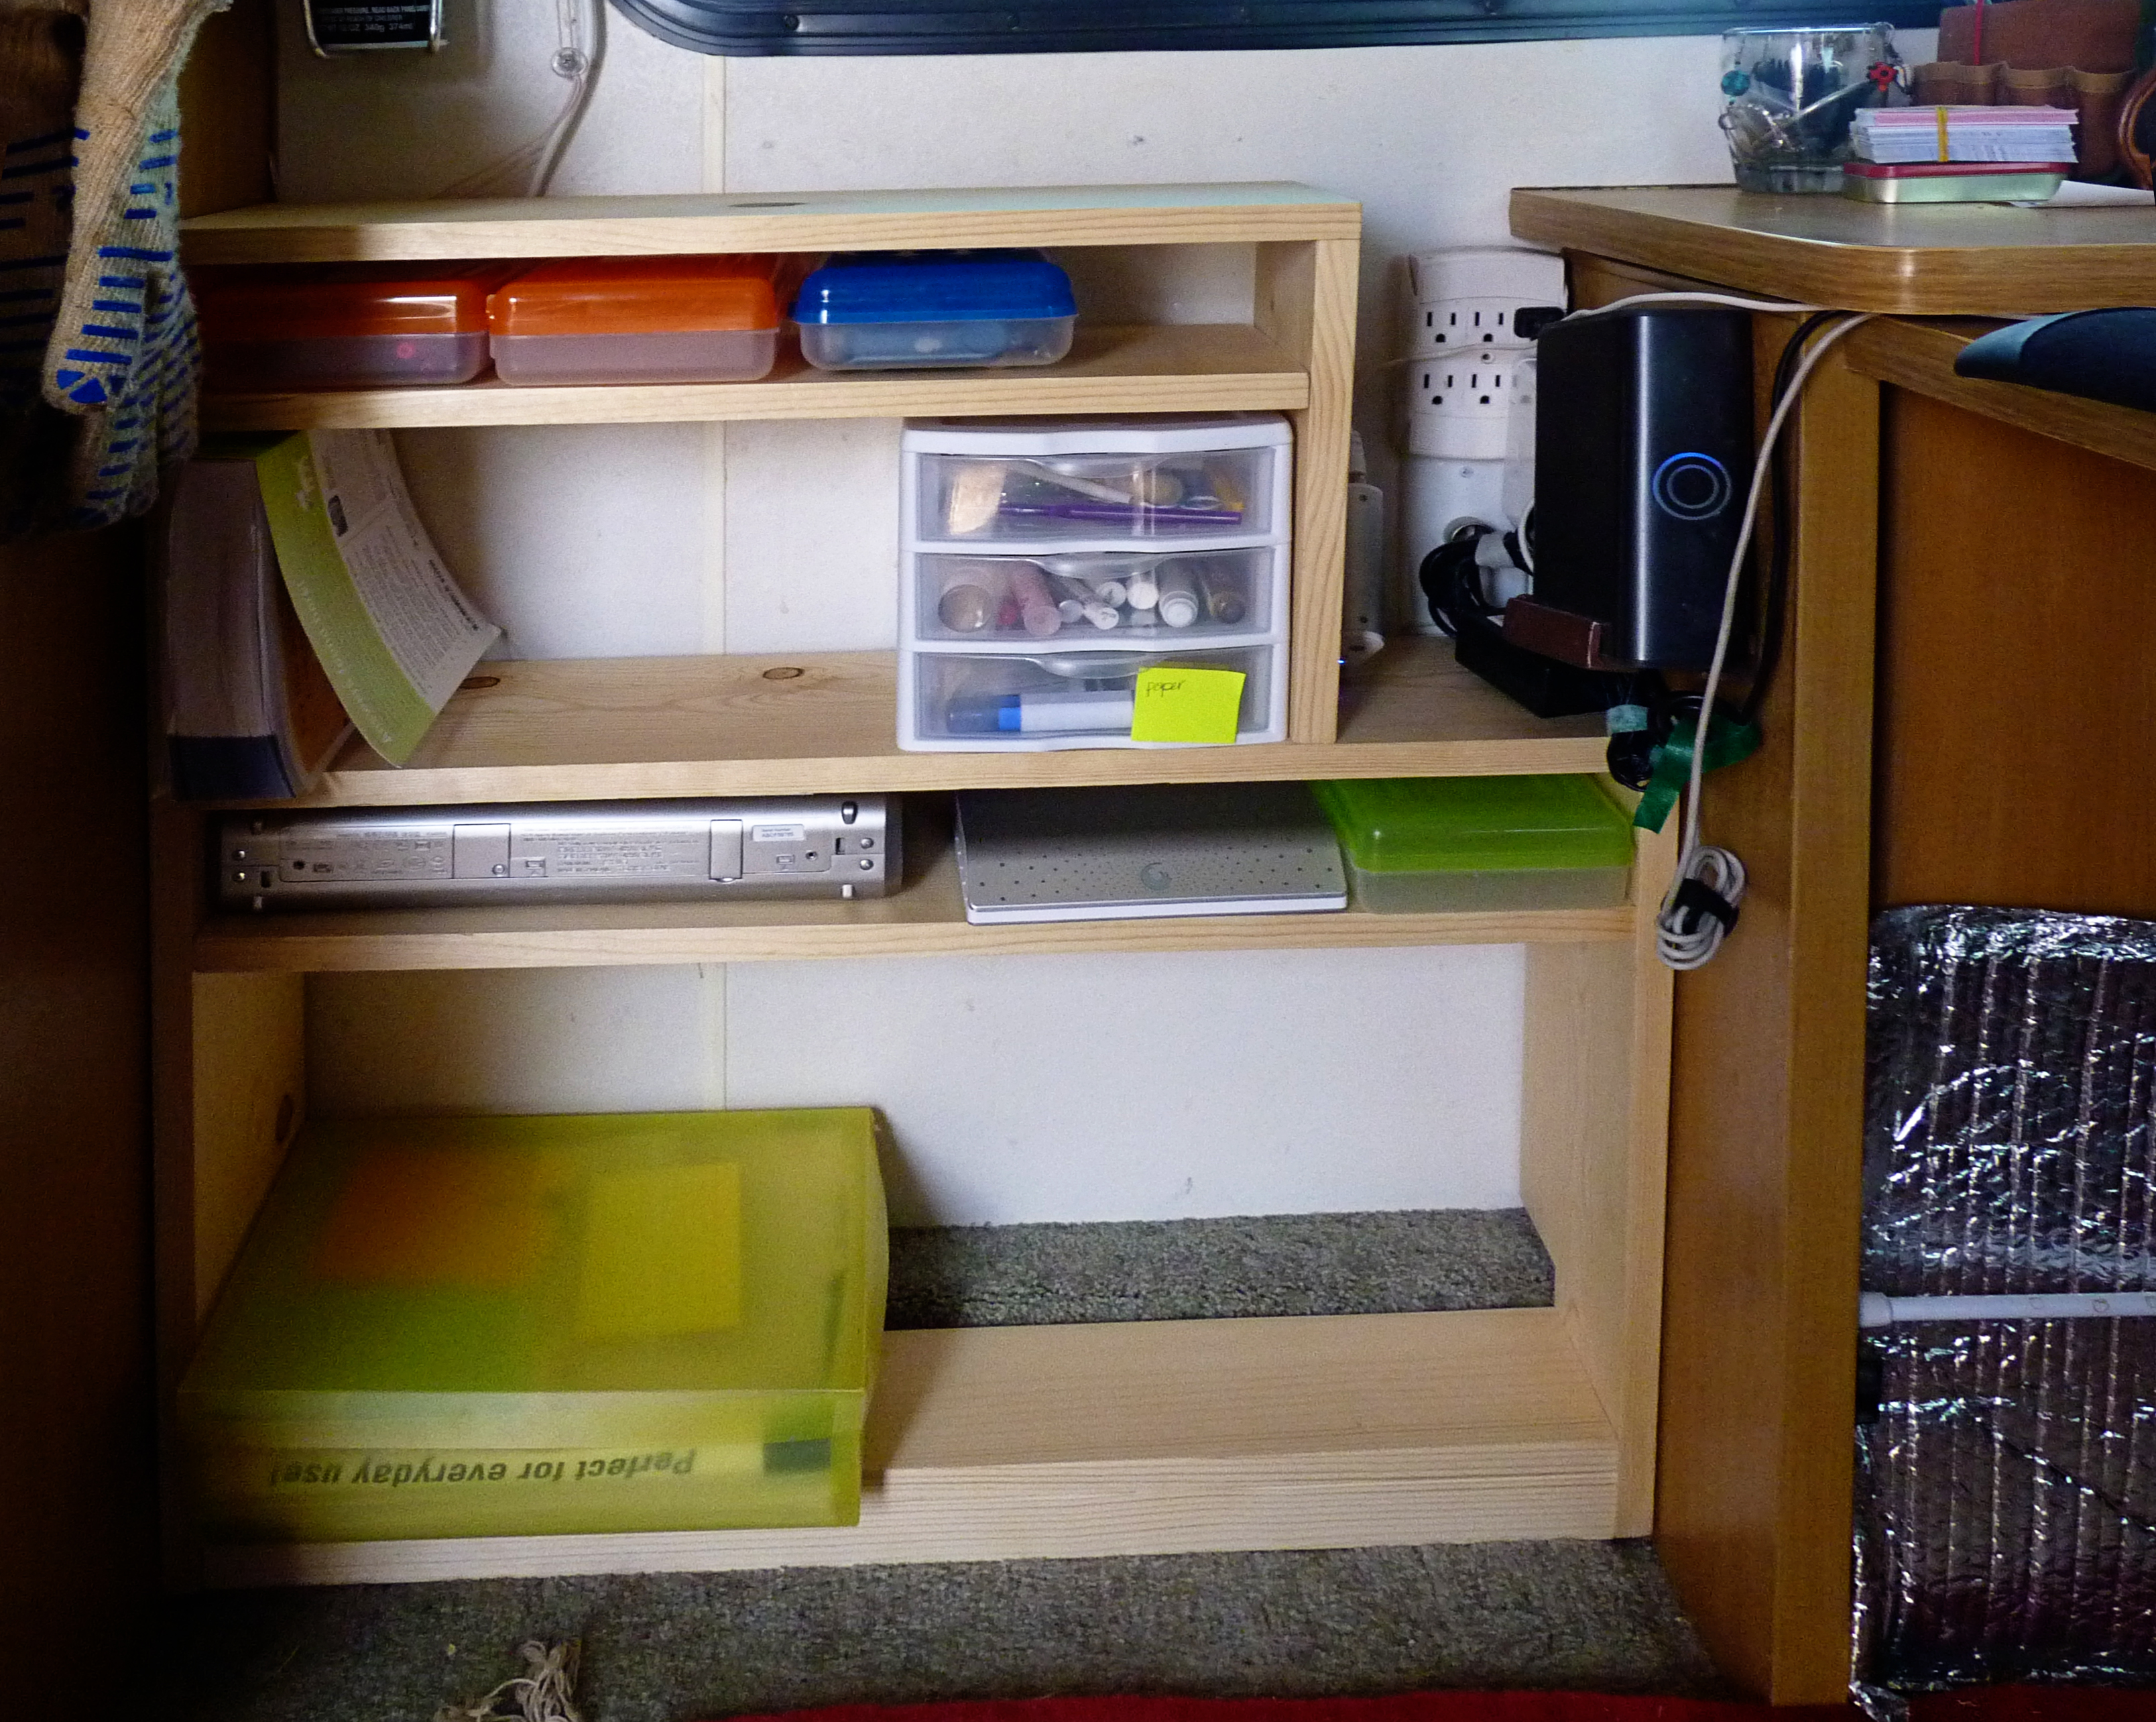
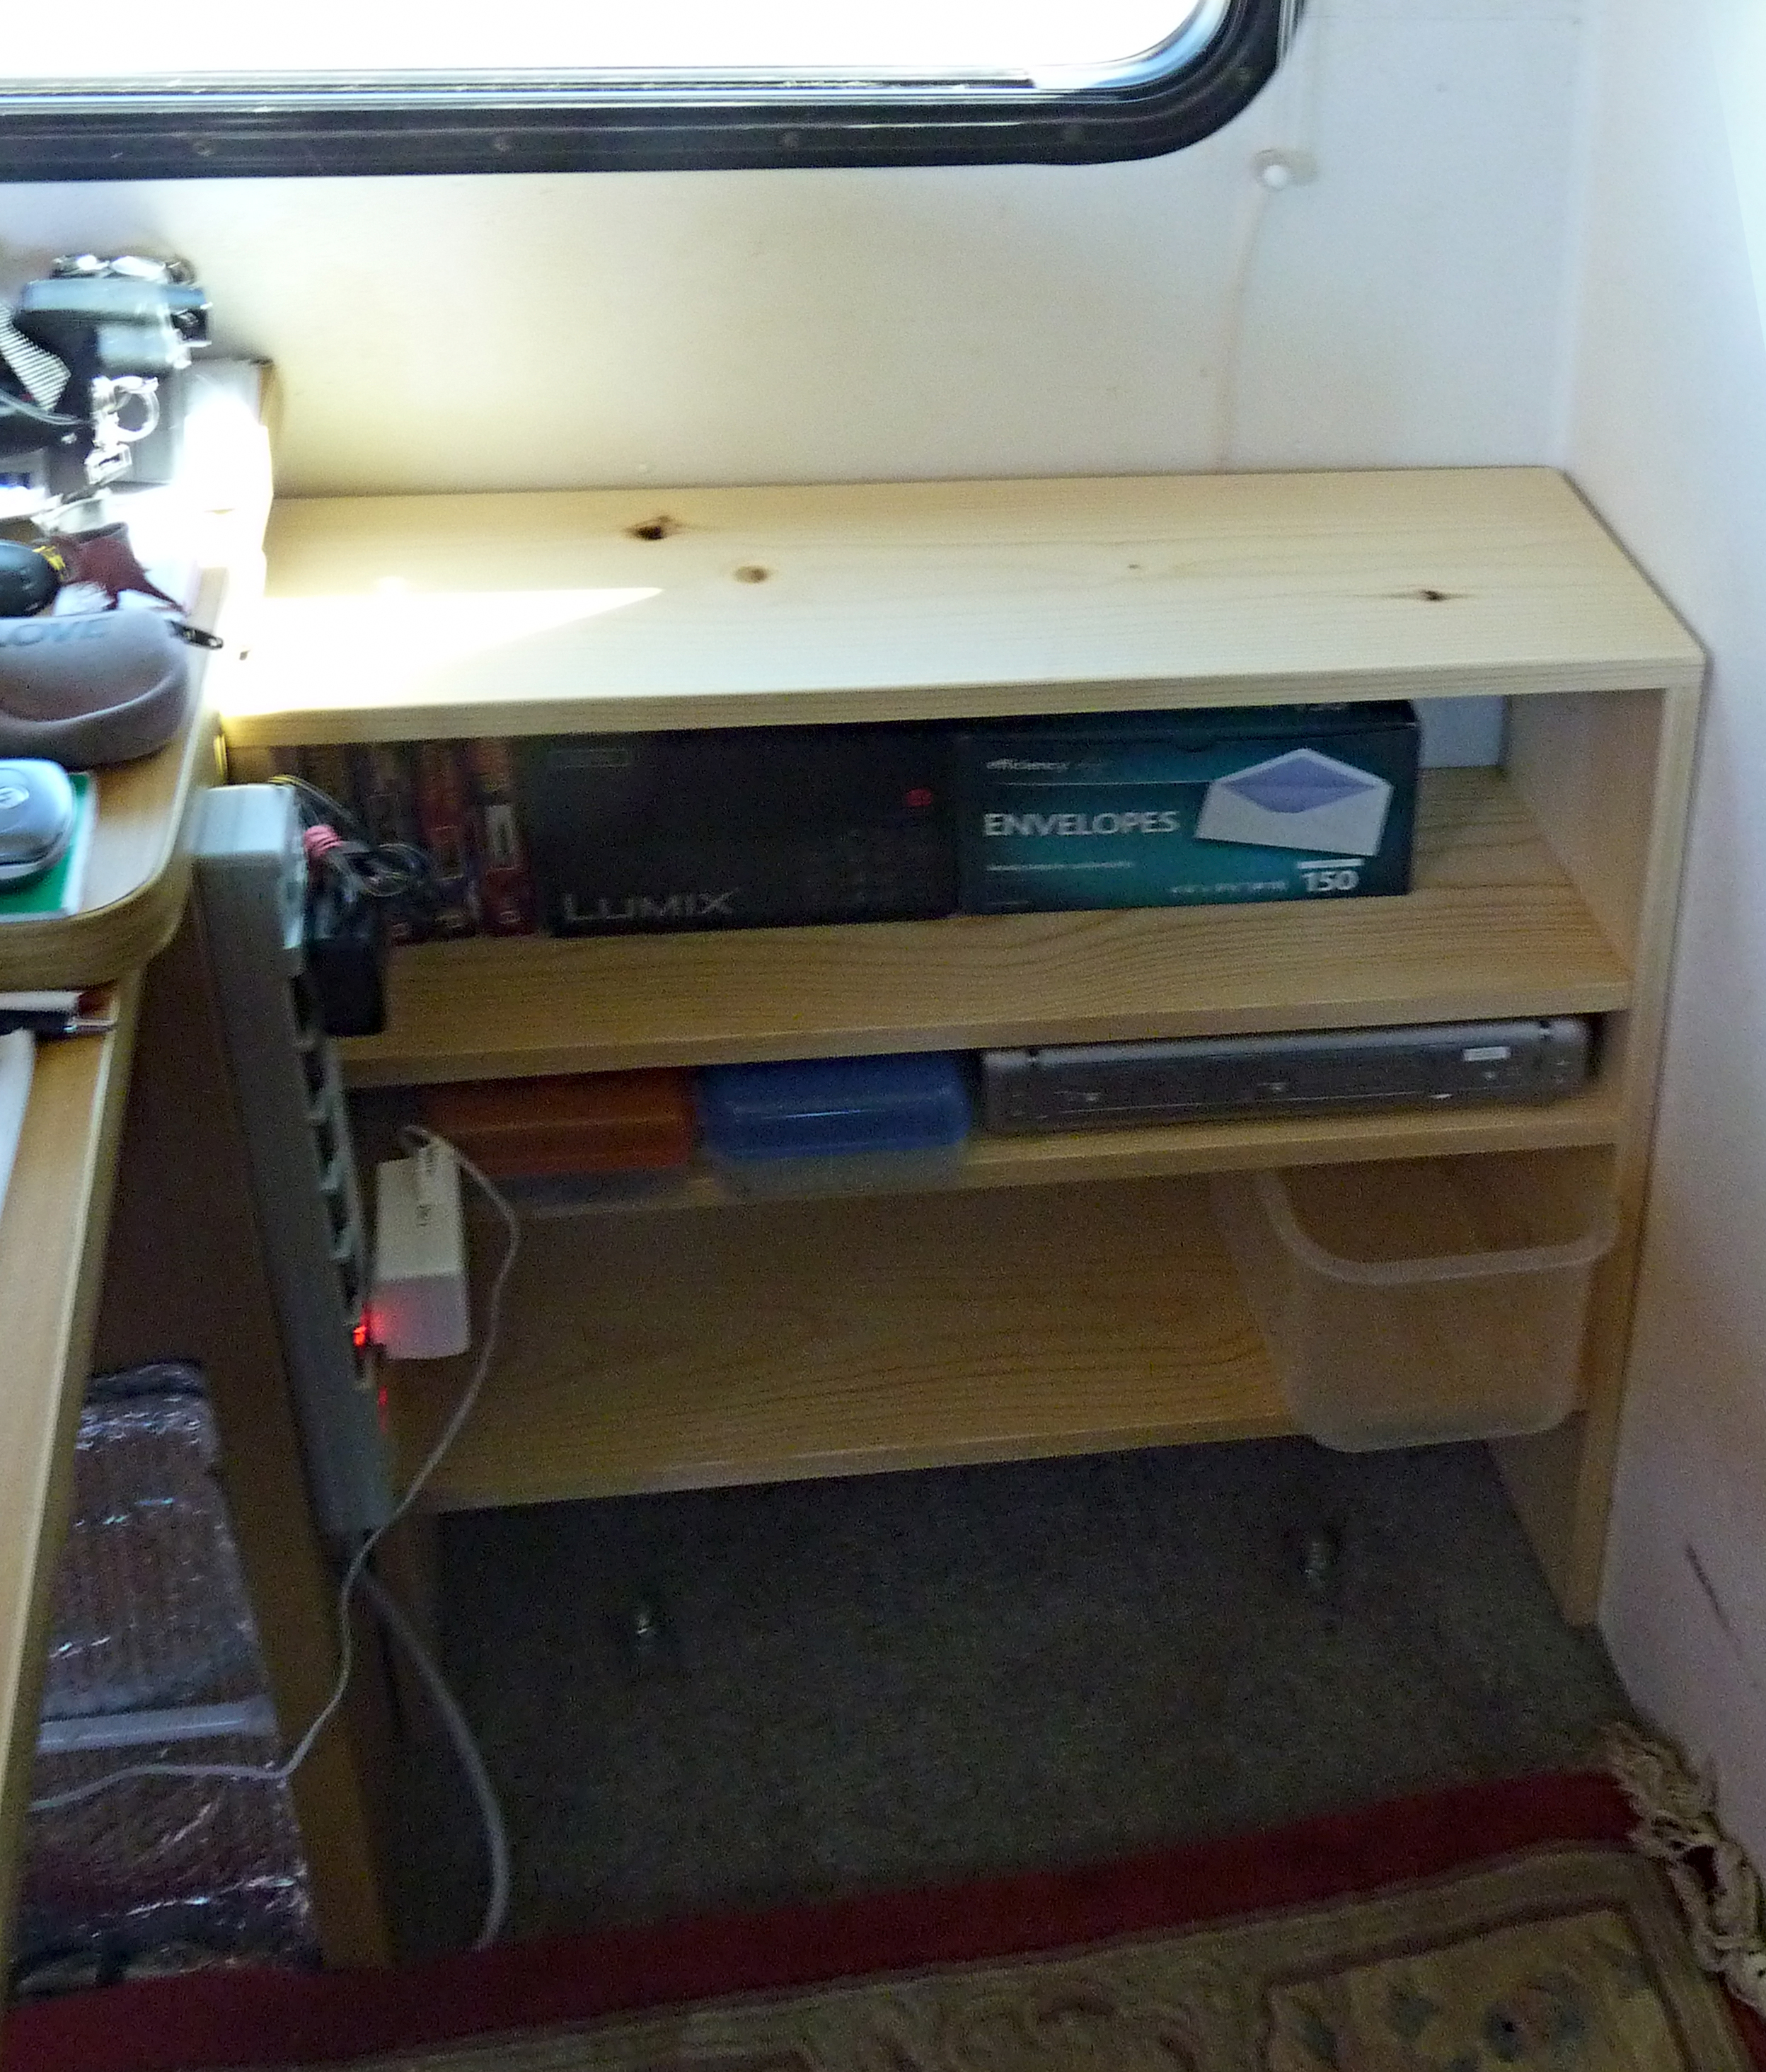
Here's a shot of the shelf between the flip out table and the kitchen, the table is on the right. This was taken after the shelf was installed, but I haven't yet got it set up for everyday use.


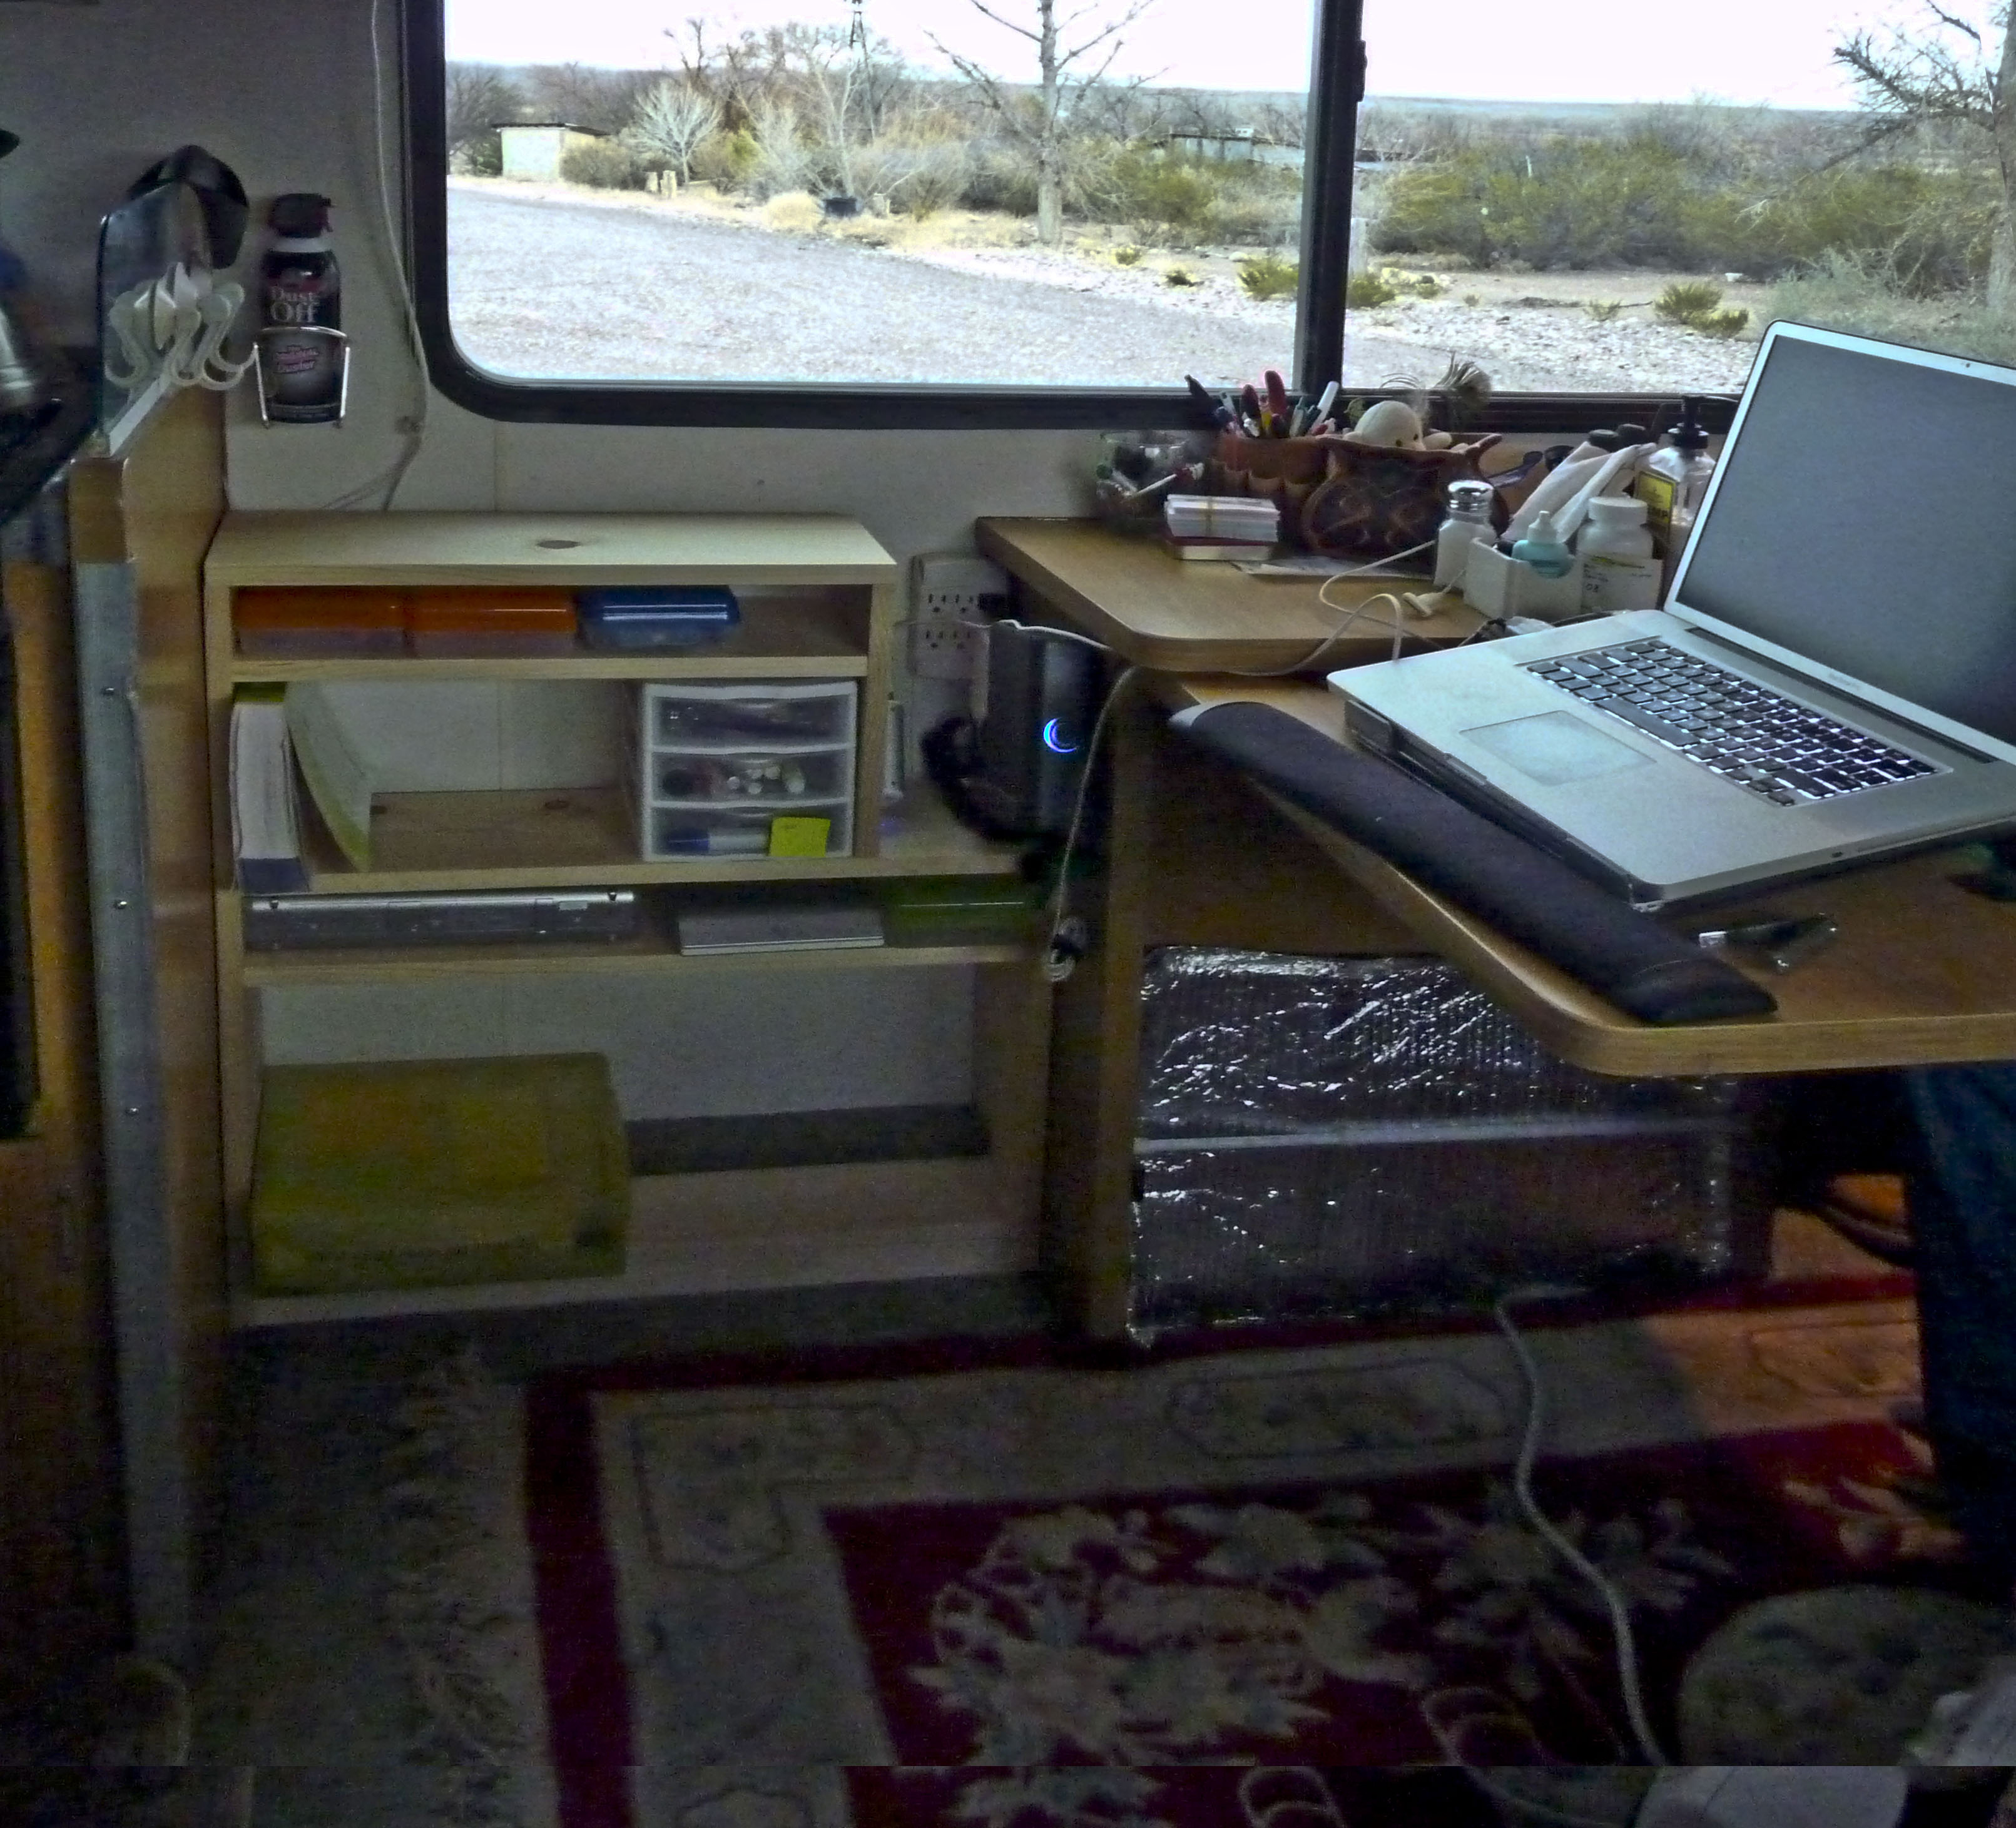
You can see where we modified the shelf to allow access to the 120v outlet, as well as leaving room for a permanently installed hard drive. We measured the shelves to allow room for the small boxes for things like cables, etc. The other shelves are made to fit the Sterlite CD boxes (#1892). We like these boxes because they have square sides, and fit a lot more things than containers with sloped sides. While I like the boxes, I hate the bright blue and turquoise tops (plus they make the containers themselves taller). We looked around at all the lids we had left over from the closet project, and decided to cut out lids that would just fit right down into the top of the containers. Then, we'll label them and put in small leather pull tabs (so they'll come straight up and out). Should work great.

This is the shelf on the other side, towards the front of the rig.

And here's a somewhat wider shot of the kitchen side shelf, so you can better see the placement in the rig.


ANYHOW, they're in, but this has lead to a whole new project.

Isn't that always the way?

Once again, I find myself reorganizing everything in the motorhome. It's a lot of work, but wow, how nice this will be when it's all put together.

Hopefully, I'll get you pictures when we're all done.

Friday, February 5, 2010

The Closet

.
As I mentioned previously, we're in the midst of some upgrades to the motorhome. We have some small shelf units planned for an unused space in the living room, and I have finally decided it's time to do something with my closet.

Please note that if you don't have a 30 foot Twin Bed Lazy Daze, this blog entry may be of no interest to you. The pictures aren't great, but they will give you some idea of the project.

In the 30 foot twin model (and only in this model, I believe) the closet on the passenger side is an odd shape, allowing for a larger shower. As built, it provides a nice space for hanging clothes, but to me, that just isn't the best use of the space.
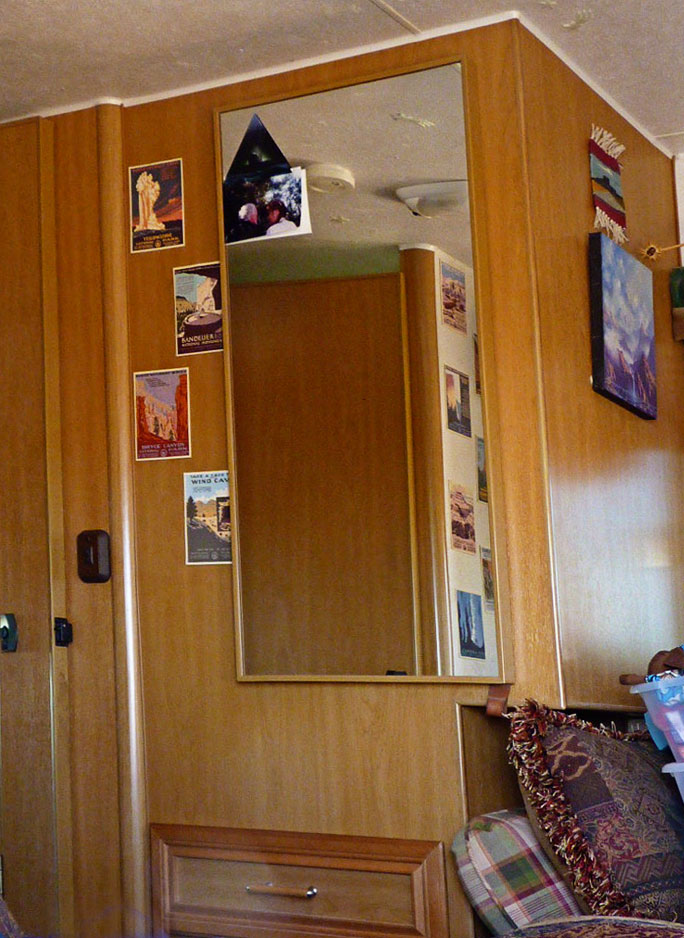
Here's a photo of the closet from the outside.
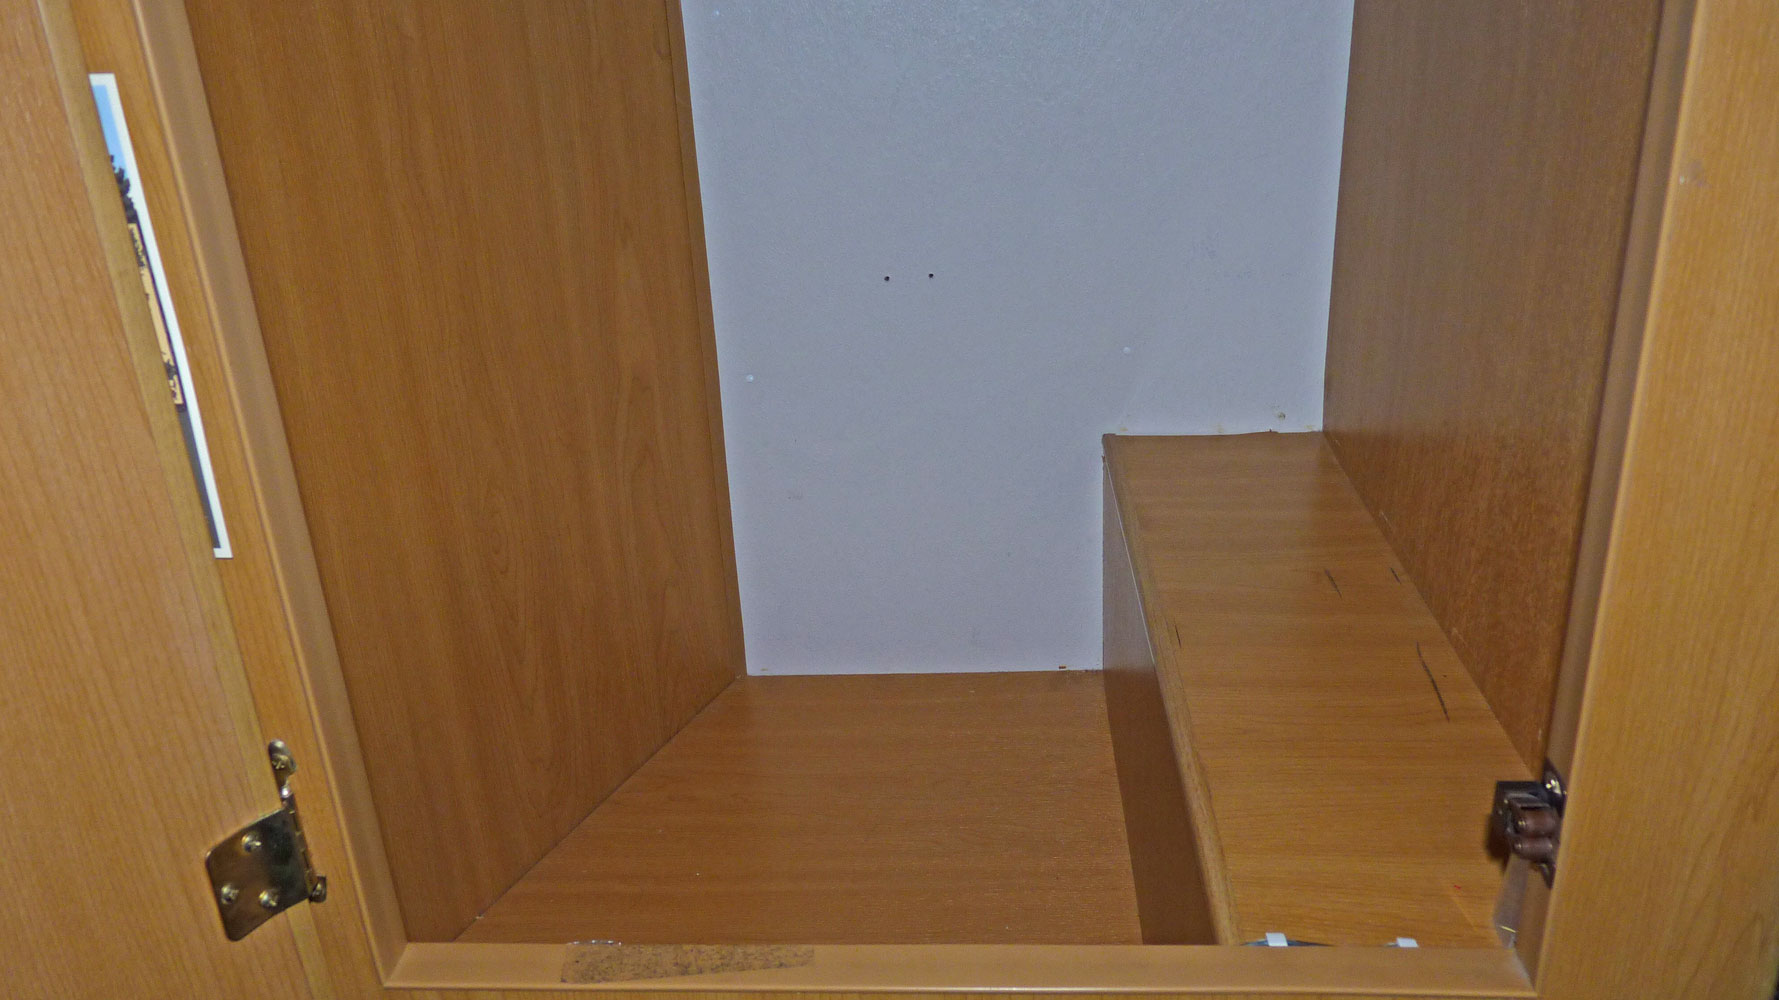
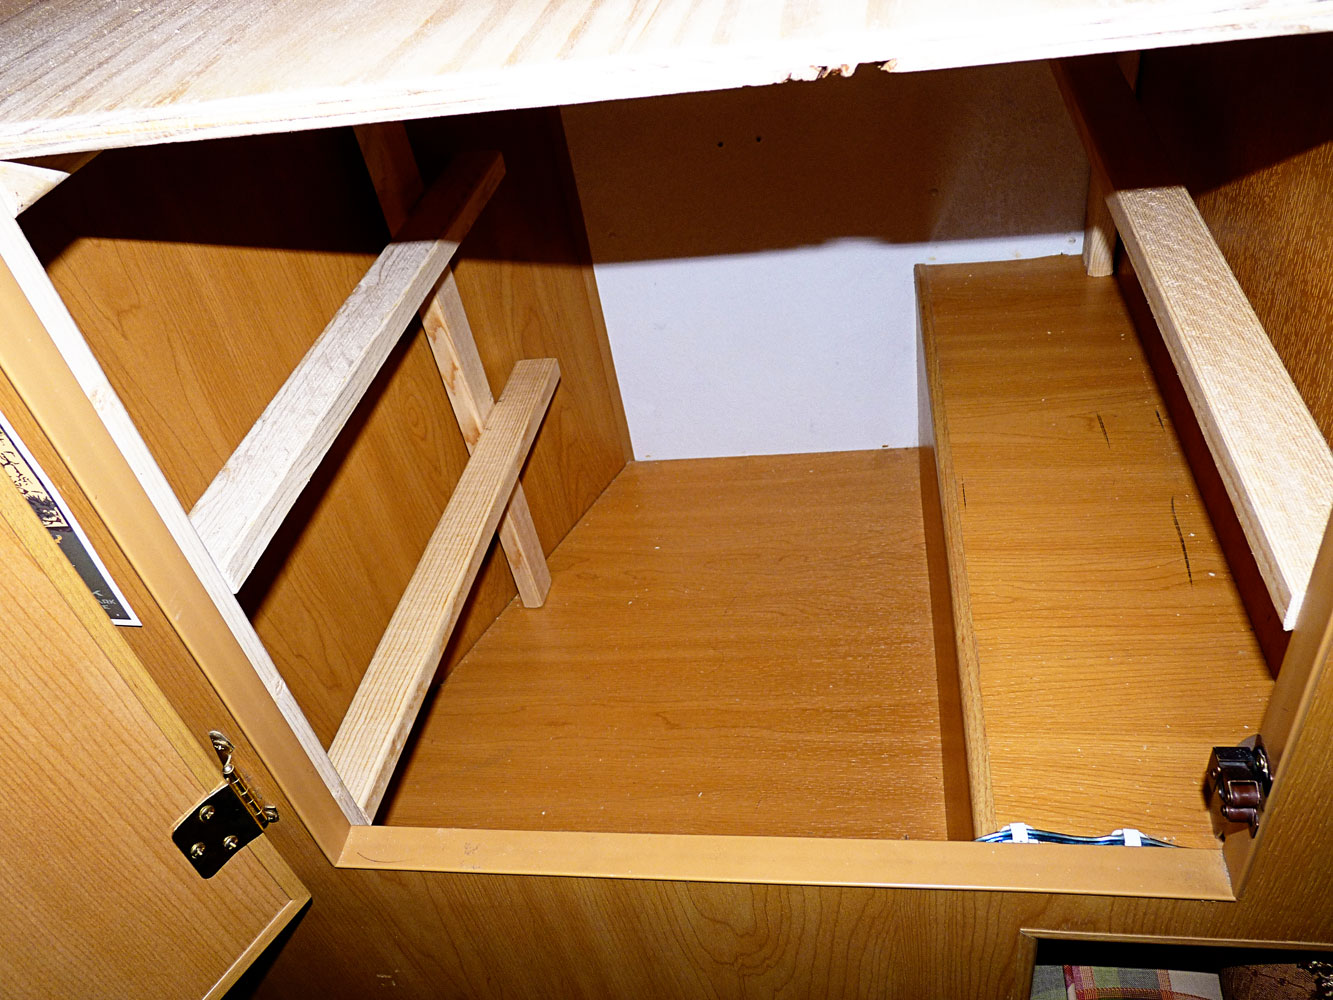
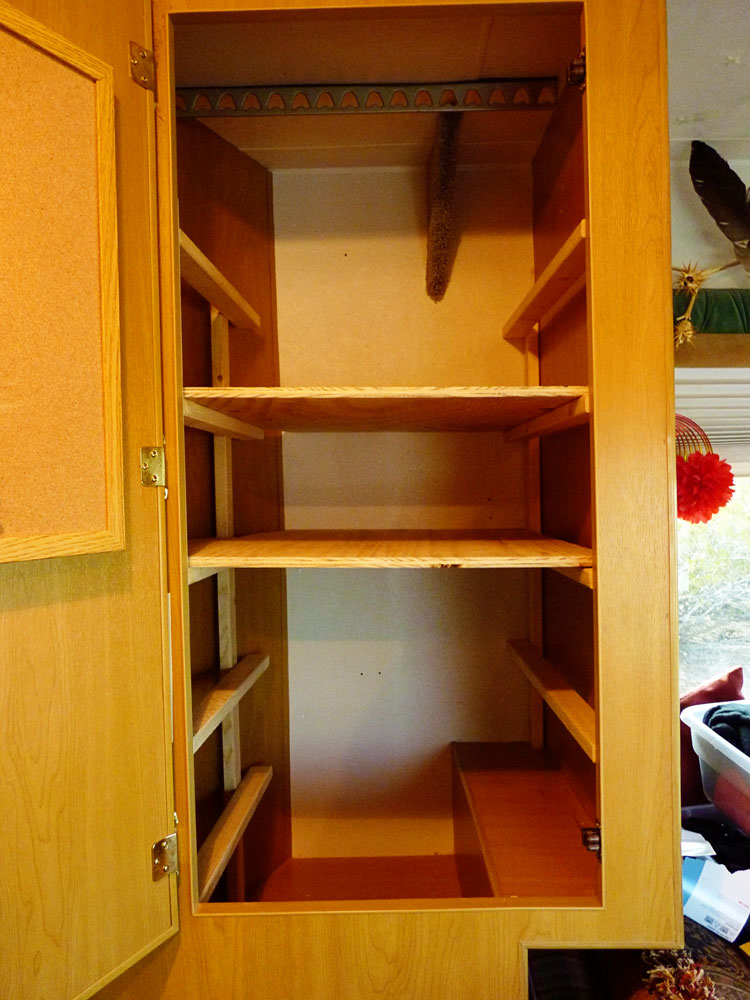
The closet itself is much larger than the door, meaning that whatever solution we came up with would have to take that into account. Here's a shot of the complete inside of the closet.

Notice the carpeted piece at the top of the closet. That's a steel roll bar. All Lazy Daze have them and recently we heard of a horrible accident where a new Lazy Daze hit some black ice and did a roll over. The folks came out fine and the rig did not tear apart. I love the way these motor homes are built.
Back to the project.

There's a well in the bottom of the closet, a bit smaller than the rest of the closet.

Since we've been in the rig, I've used two hanging shoe type affairs, basically making shelves out of these hanging units. The problem has been that these were only about half the depth of the closet. Over time, stuff gets piled up in front of the "shelves" and in no time at all, I feel like I'm in Fibber McGee's house.

As we've been discussing ways of better utilizing the space, I've been looking at different solutions. I found some long low plastic boxes (Sterlite 28 qt, #1846) that were just the perfect length to slide right into the closet, just clearing the door.
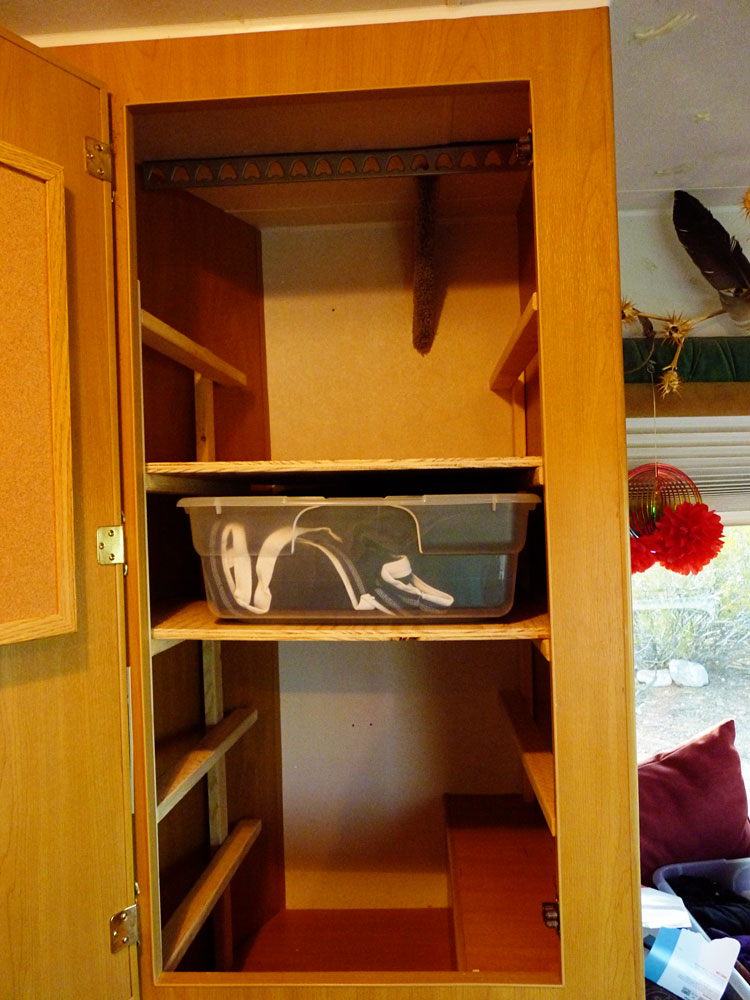
So with the help of our friend John, we drew up same loose plans, and here we go. This is the bracing for the shelves.
Here's a shot looking down into the well. You can sort of see the irregular shape of the closet here. We attached the left hand brace to the front of the closet.

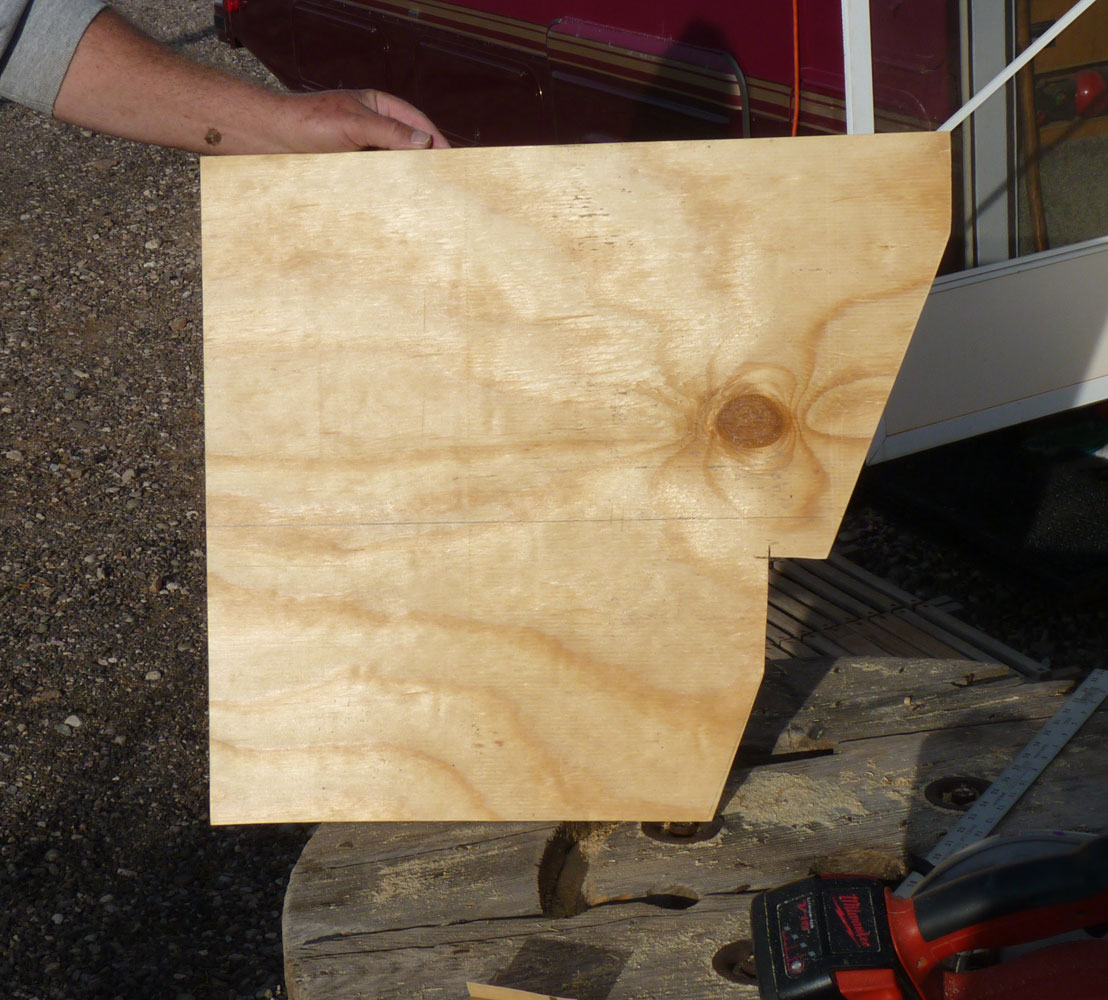
Then we started working on shelves. As you can imagine, no square shelf was ever going to fit into this closet.

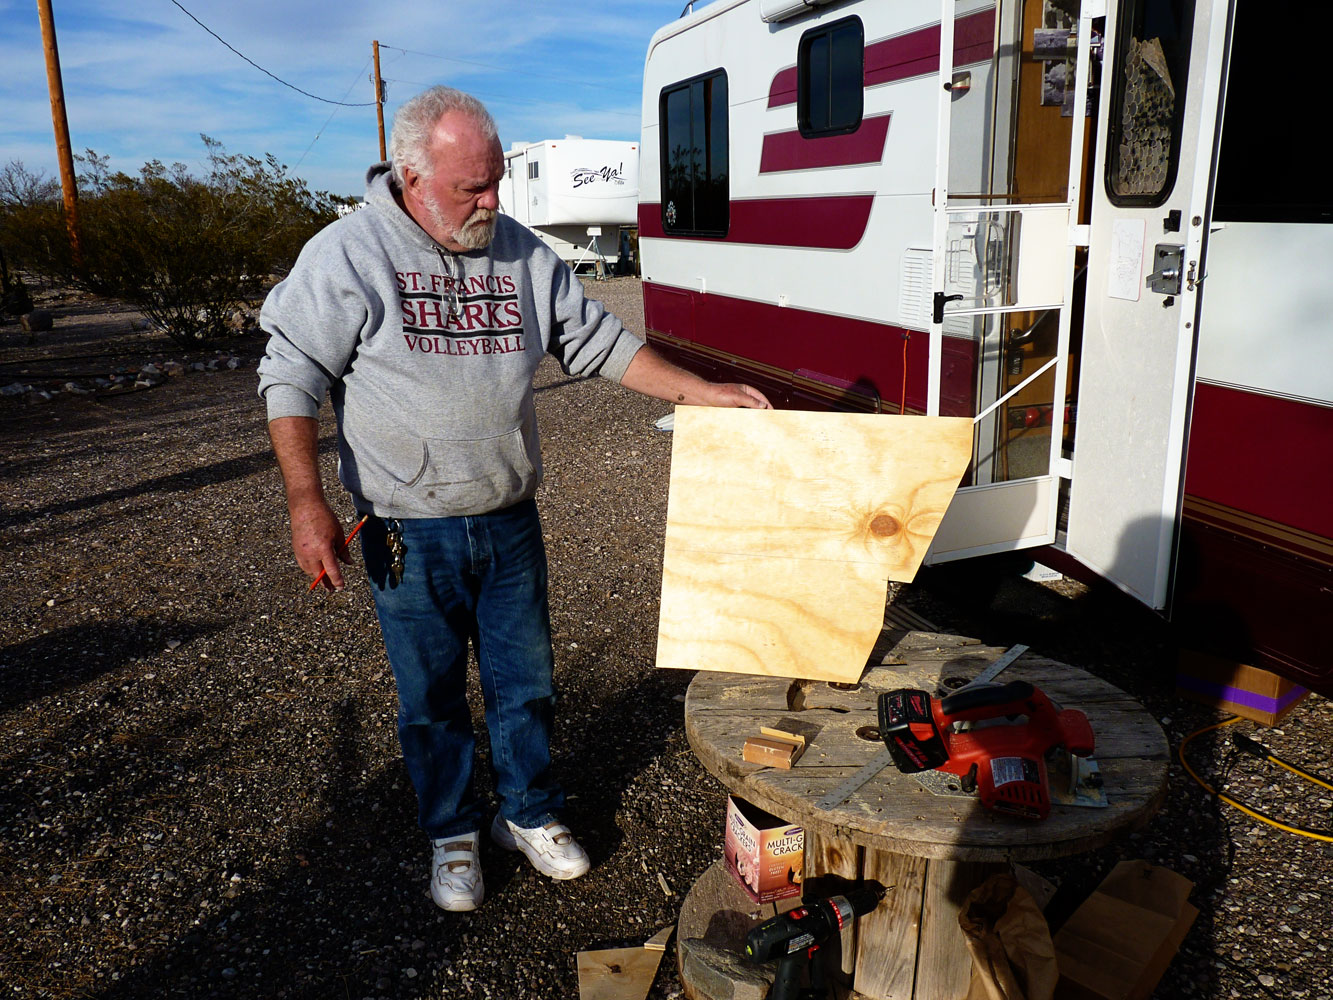
Here's my Dear Man,
showing one of the shelves.


Here's a better shot
of the shape of the shelf.

Each one had to be tweaked to fit perfectly onto each bracket. Finally we figured out that to get them into the closet and on the brackets, each would have to be cut side to side.

Here's the first test of a shelf. The fit is looking good. But geez, somehow, my wood has changed to a peculiar shade of yellow. Couldn’t be the photographer, must be a cosmic shift in the color spectrum.


But Hooray!
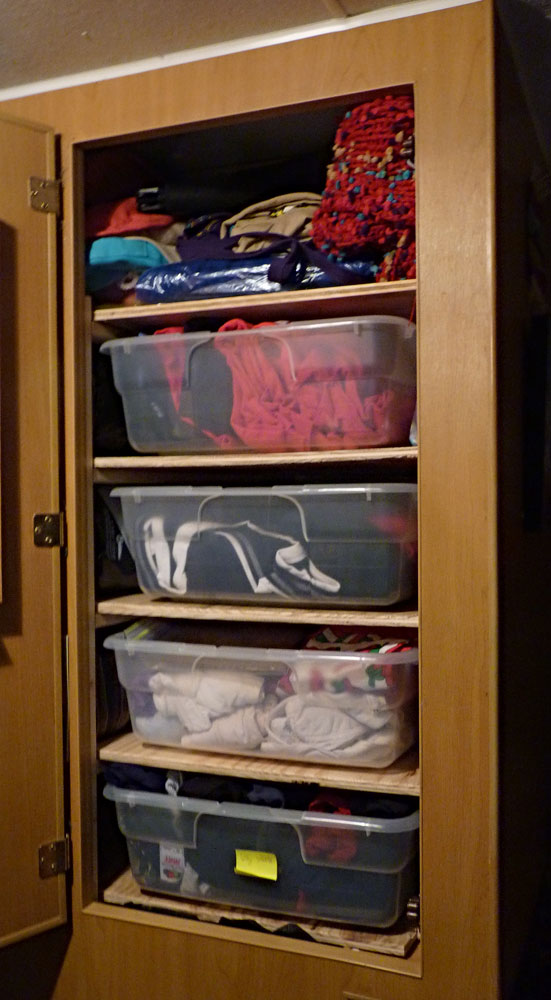
The containers fit.


So with a lot of measuring and fitting,
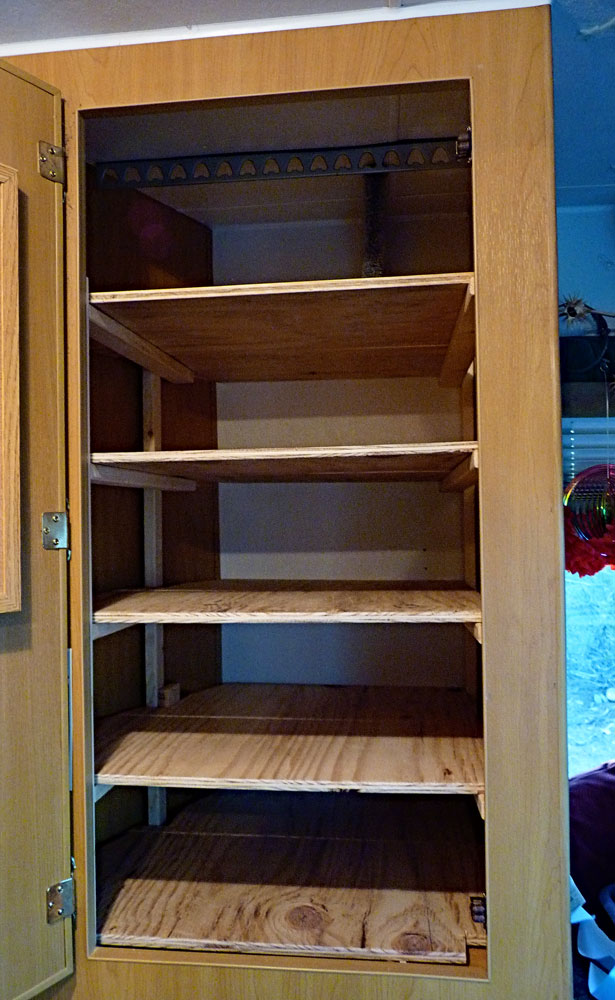
all the shelves went in the closet.

Huzzah!!!
I have a usable closet.


Now,
about those shelves in the living room . . .

Tuesday, January 12, 2010

Small Town America

.
Coming from what is considered a small town in California, I felt I understood Small Town America.

But that was before I spent time in New Mexico.

You see, in California, most of the small towns (at least in Central California) may be small in population, but you are never really very far from a metropolitan area. Even when we first moved to Boulder Creek, some thirty five plus years ago, while the population was a sparse twenty five hundred, Santa Cruz was just fifteen miles away, and for big items, San Jose was a forty five minute drive.

Still, it was an introduction to small town life I had never experienced. We became friends with people who had never left "the valley" except to go to Santa Cruz. Many had never been to San Francisco.

These people had a different outlook on life than those who had been raised in a more urban environment.

And I liked them. They were involved in community in a way I had never known. Granted they were a bit leery of "outsiders" but they had something I had never found.

Over the years that all changed. We moved from Boulder Creek to Ben Lomond, then to Felton. As we moved "down the valley" the whole area changed.

We watched as it morphed from a place where families lived and stayed to a place where people had their homes, but commuted for long periods every day, meaning they had little time to spend in the community. They shopped and took advantage of the entertainment in the metropolitan areas where they worked. They seemed to only spend time at home on the weekend.

As the population exploded, our little haven became a bedroom community for Silicon Valley.

Since it happened so gradually, we didn't really take notice. We were fortunate to have good jobs close to home. This meant that we weren't involved in the hellacious commutes, and time just sort of rambled on.

We were oblivious.

Then
we decided

to try RVing
and
we discovered
New Mexico.


We rediscovered
the truth
of small town America.


We remembered
what we had lost.


I love New Mexico
the landscape
the skies
but
most of all
the people
and
how they are tied
to the land

and each other.